OBS Studio is one of the most popular open-source tools for recording and live streaming video. It’s widely used by gamers, educators, and professionals who need to capture screen activity or broadcast live content. FunOS users can install OBS Studio easily, either from the official Ubuntu repositories or by using the official OBS Studio PPA for the latest version.
In this guide, you’ll learn two methods to install OBS Studio on FunOS, how to launch it, and how to reload the menu so the new application appears properly in your system.
What is OBS Studio?
OBS Studio (Open Broadcaster Software Studio) is a free and open-source software used for video recording and live streaming. It allows users to capture screen activity, webcam video, audio sources, and combine them into scenes for professional-looking productions. OBS Studio supports streaming directly to platforms such as YouTube, Twitch, and Facebook Live, or saving recordings locally in formats like MP4 or MKV.
It provides advanced features like real-time video/audio mixing, transitions between scenes, support for multiple sources (display capture, window capture, webcam, audio input/output), and plugins for extending functionality. OBS Studio is highly customizable and optimized for performance, making it a top choice for Linux users who need powerful streaming and recording capabilities.
How to Install OBS Studio on FunOS
There are two recommended ways to install OBS Studio on FunOS: from the Ubuntu repositories (stable version) or from the official OBS Studio PPA (latest version).
Method 1: Installing from the Ubuntu Repositories
Work on: 22.04.5 ✅ | 24.04.4 ✅ | 25.10 ✅ | 26.04 ✅
This method installs the version of OBS Studio included in the Ubuntu repositories. It’s stable, tested, and fully compatible with FunOS.
Step 1: Open a Terminal
There are three easy ways to open the Terminal:
- Click Menu in the lower-left corner of the screen, then click Terminal
- Click the Terminal icon in the Tray
- Press Ctrl + Alt + T on your keyboard
Step 2: Update the Package List
Before installing any package, it’s best to update your system’s package index to ensure you get the latest available versions.
sudo apt updateStep 3: Install OBS Studio
Now install OBS Studio along with the required FFmpeg package, which enables multimedia functionality such as encoding and decoding video and audio streams.
sudo apt install ffmpeg obs-studioStep 4: Reload the Menu
Note: Starting with FunOS 24.04.4 LTS (Build 20260618) and FunOS 26.04 LTS (Build 20260618), the menu updates automatically, so you can skip this step.
After the installation is complete, reload the system menu so that OBS Studio appears in the application list.
- Click the Menu button in the lower-left corner
- Click Reload menu
Method 2: Installing from the OBS Studio PPA
Work on: 22.04.5 ✅ | 24.04.4 ✅ | 25.10 ✅ | 26.04 ✅
If you prefer the latest version of OBS Studio with newer features and improvements, you can install it from the official OBS Studio PPA.
Step 1: Open a Terminal
You can open the Terminal in any of the following ways:
- Click Menu in the lower-left corner, then click Terminal
- Click the Terminal icon in the Tray
- Press Ctrl + Alt + T
Step 2: Add the OBS Studio PPA
The PPA is maintained by the official OBS Project team and provides updated versions of OBS Studio.
sudo add-apt-repository ppa:obsproject/obs-studioStep 3: Update the Package List
After adding the PPA, update the package index again to include the new repository.
sudo apt updateStep 4: Install OBS Studio
Now install OBS Studio and FFmpeg using the following command:
sudo apt install ffmpeg obs-studioStep 5: Reload the Menu
Note: Starting with FunOS 24.04.4 LTS (Build 20260618) and FunOS 26.04 LTS (Build 20260618), the menu updates automatically, so you can skip this step.
Once the installation is done, reload the menu so OBS Studio appears.
- Click the Menu button in the lower-left corner
- Click Reload menu
Launching OBS Studio
After installation, you can launch OBS Studio from the system menu:
- Click the Menu button in the lower-left corner of the screen
- Go to the Multimedia category
- Click OBS Studio
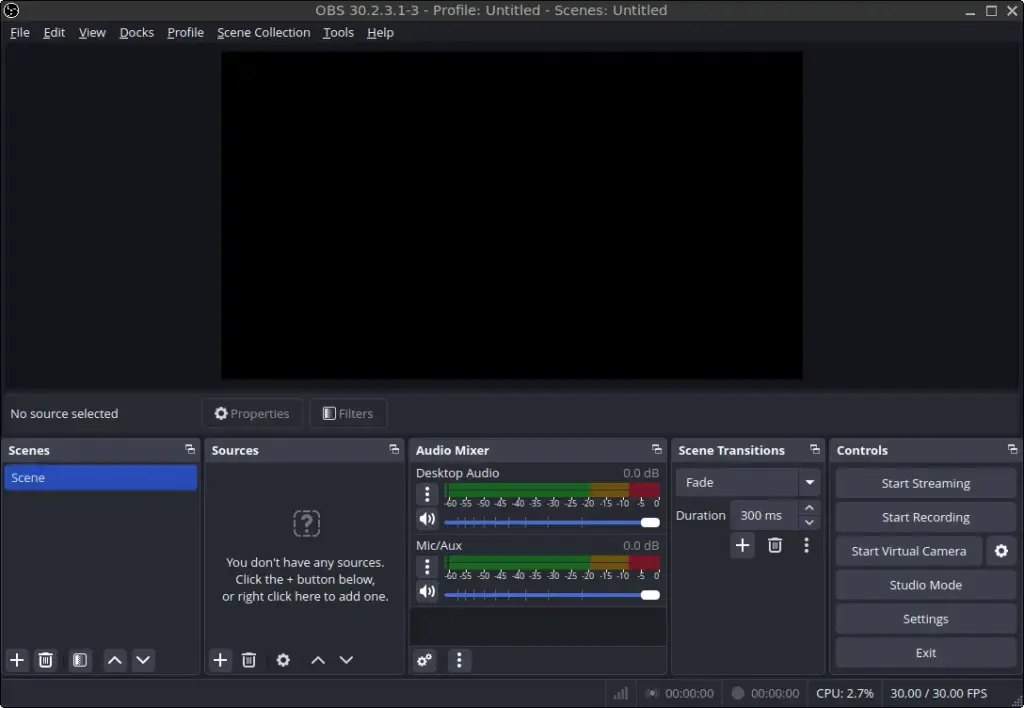
OBS Studio will start, and you’ll see the main interface where you can create scenes, add sources, configure audio, and start recording or streaming.
How to Uninstall OBS Studio on FunOS
If you no longer need OBS Studio or want to reinstall it cleanly, you can easily remove it from your FunOS system. The uninstallation steps differ slightly depending on how OBS Studio was installed—either from the Ubuntu repositories or from the official OBS Studio PPA. Follow the method that matches your installation source.
Uninstall OBS Studio Installed from the Ubuntu Repositories
This method applies if you installed OBS Studio using the standard Ubuntu repositories.
Step 1: Open a Terminal
There are several ways to open the Terminal:
- Click Menu in the lower-left corner of the screen, then click Terminal
- Click the Terminal icon in the Tray
- Press Ctrl + Alt + T on your keyboard
Step 2: Remove OBS Studio
To remove OBS Studio and its configuration files from the system, run:
sudo apt remove --purge obs-studioStep 3: Remove Any Unused Dependencies
Clean up unused libraries and dependencies that were automatically installed with OBS Studio:
sudo apt autoremove --purgeStep 4: Remove User Data (Optional)
If you want to completely delete all personal OBS Studio settings and profiles, remove its configuration directory:
rm -rf $HOME/.config/obs-studioStep 5: Reload the Menu
Note: Starting with FunOS 24.04.4 LTS (Build 20260618) and FunOS 26.04 LTS (Build 20260618), the menu updates automatically, so you can skip this step.
After removing OBS Studio, reload the menu to remove its entry from the application list:
- Click the Menu button in the lower-left corner
- Click Reload menu
Uninstall OBS Studio Installed from the OBS Studio PPA
If you installed OBS Studio from the official PPA, follow these steps to remove both the application and the repository.
Step 1: Open a Terminal
You can open the Terminal in one of these ways:
- Click Menu in the lower-left corner, then click Terminal
- Click the Terminal icon in the Tray
- Press Ctrl + Alt + T
Step 2: Remove OBS Studio
Uninstall OBS Studio and purge its configuration files:
sudo apt remove --purge obs-studioStep 3: Remove Any Unused Dependencies
Clean up any automatically installed packages that are no longer needed:
sudo apt autoremove --purgeStep 4: Remove the OBS Studio PPA
To ensure your system no longer receives updates from the OBS Studio PPA, remove the repository:
sudo add-apt-repository --remove ppa:obsproject/obs-studioStep 5: Update the Package List
After removing the PPA, refresh your package list:
sudo apt updateStep 6: Remove User Data (Optional)
If you want to completely reset OBS Studio and delete your user data, remove the configuration folder:
rm -rf $HOME/.config/obs-studioStep 7: Reload the Menu
Note: Starting with FunOS 24.04.4 LTS (Build 20260618) and FunOS 26.04 LTS (Build 20260618), the menu updates automatically, so you can skip this step.
Finally, reload the menu to remove OBS Studio from the application list:
- Click the Menu button in the lower-left corner
- Click Reload menu
Conclusion
OBS Studio is a powerful and versatile tool for video recording and live streaming, and installing it on FunOS is straightforward—whether you choose the stable version from the Ubuntu repositories or the latest release from the official OBS Studio PPA.
By following the steps in this guide, you can easily install, launch, and even completely uninstall OBS Studio when needed. Whether you’re capturing tutorials, streaming gameplay, or creating professional broadcasts, OBS Studio provides all the tools you need directly on your FunOS system.