Blender is one of the most popular open-source 3D creation tools in the world. It’s widely used for modeling, animation, rendering, video editing, and even game development. On FunOS, you can easily install Blender using the Ubuntu repositories or by downloading the official package directly from the Blender website. This guide will walk you through both installation methods step-by-step, so you can choose the one that best fits your needs.
What is Blender?
Blender is a free and open-source 3D creation suite developed by the Blender Foundation. It provides a complete range of tools for 3D modeling, sculpting, animation, simulation, rendering, compositing, motion tracking, and video editing—all in a single application. Blender supports many popular file formats and integrates seamlessly with Python scripting for automation and custom tools. Because it’s open source, Blender runs efficiently on Linux systems like FunOS and can be extended or customized according to user needs.
How to Install Blender on FunOS
There are two ways to install Blender on FunOS:
- Installing from the Ubuntu repositories (simpler and automatically updated)
- Installing manually from Blender’s official website (for the latest version)
Method 1: Installing from the Ubuntu Repositories
Work on: 22.04.5 ✅ | 24.04.4 ✅ | 25.10 ✅ | 26.04 ✅
This method installs Blender directly from the official Ubuntu repositories, ensuring stability and automatic updates through the system’s package manager.
Step 1: Open a Terminal
You can open a terminal using one of the following methods:
- Click Menu in the left corner of the screen, then click Terminal
- Click the Terminal icon in the Tray
- Press Ctrl + Alt + T
Step 2: Update the Package List
Before installing Blender, update your package list to make sure you have the latest information about available software:
sudo apt updateStep 3: Install Blender
Once the package list is updated, install Blender using the following command:
sudo apt install blenderStep 4: Reload the Menu
After the installation completes, refresh the application menu so Blender appears:
- Click the Menu button in the lower-left corner
- Click Reload menu
Method 2: Using the .tar.xz Package from Blender’s Official Website
Work on: 22.04.5 ✅ | 24.04.4 ✅ | 25.10 ✅ | 26.04 ✅
This method allows you to install the latest Blender release directly from the official Blender website. It’s ideal if you want the newest features or if the repository version is outdated.
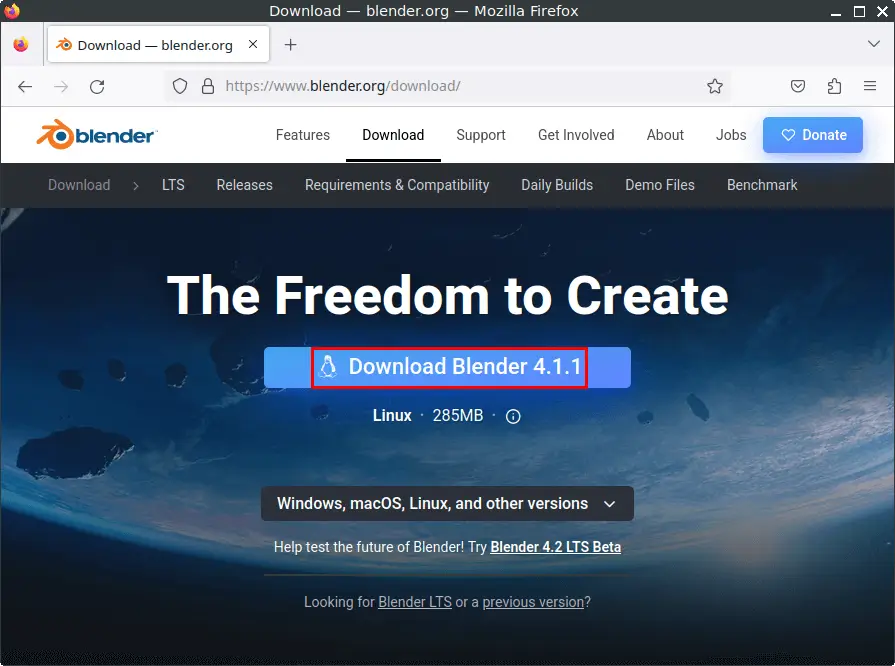
Step 1: Download the Blender tarball (.tar.xz) File
- Open your web browser and go to the Blender download page.
- Click the “Download Blender” button.
- Save the file in your Downloads directory.
Step 2: Open a Terminal
You can open a terminal using one of the following methods:
- Click Menu in the left corner of the screen, then click Terminal
- Click the Terminal icon in the Tray
- Press Ctrl + Alt + T
Step 3: Create the Blender Directory in /opt
Create a directory for Blender in the /opt location (commonly used for manually installed software):
sudo mkdir -p /opt/blenderStep 4: Extract the tar.xz File to the /opt/blender Directory
Extract the downloaded Blender package into the newly created directory:
sudo tar -xJvf ~/Downloads/blender-*.tar.xz --strip-components=1 -C /opt/blenderStep 5: Create a Symbolic Link to the Blender Executable
This step makes it possible to launch Blender from anywhere using the blender command:
sudo ln -sf /opt/blender/blender /usr/bin/blenderStep 6: Create a Desktop Entry for Blender
Copy Blender’s desktop entry file so it appears in the application menu:
sudo cp /opt/blender/blender.desktop /usr/share/applicationsStep 7: Remove the Downloaded File
Once installed, you can delete the tarball file to free up space:
rm -f ~/Downloads/blender-*.tar.xzStep 8: Reload the Menu
After setup, reload the menu so Blender appears in your application list:
- Click the Menu button in the lower-left corner
- Click Reload menu
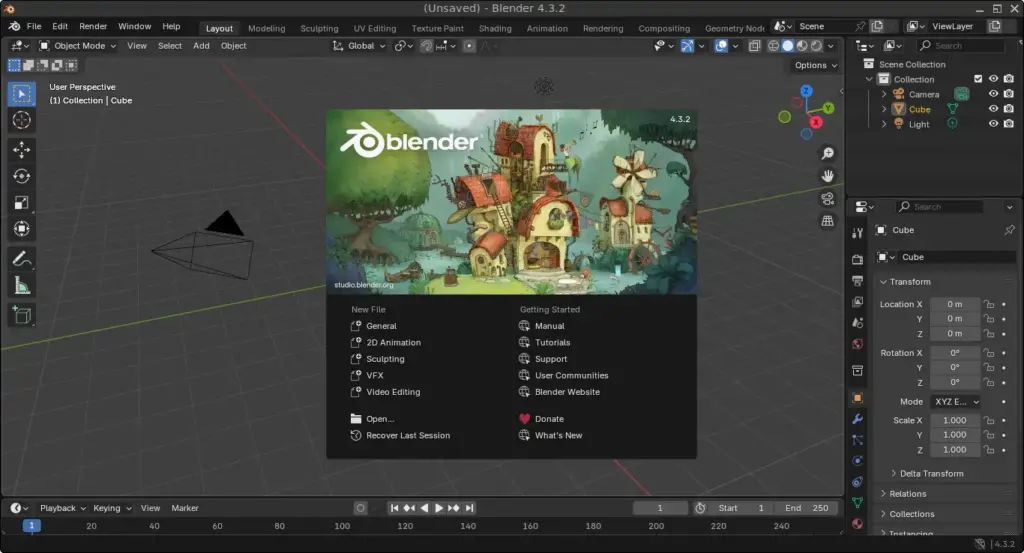
Launching Blender
To start Blender:
- Click the Menu button in the lower-left corner of the screen
- Go to the Graphics category
- Click Blender
How to Uninstall Blender on FunOS
If you no longer need Blender or want to reinstall it cleanly, you can easily remove it from your system. The uninstallation process depends on how you originally installed Blender — either from the Ubuntu repositories or from the official Blender tarball (.tar.xz) file.
Uninstall Blender Installed from the Ubuntu Repositories
If you installed Blender using the apt command from the Ubuntu repositories, follow these steps to remove it completely.
Step 1: Open a Terminal
You can open a terminal using one of the following methods:
- Click Menu in the left corner of the screen, then click Terminal
- Click the Terminal icon in the Tray
- Press Ctrl + Alt + T
Step 2: Remove Blender
Run the following command to uninstall Blender and delete its configuration files from the system:
sudo apt remove --purge blenderStep 3: Remove Any Unused Dependencies
After removing Blender, it’s a good idea to clean up packages that were installed as dependencies but are no longer needed:
sudo apt autoremove --purgeStep 4: Remove User Data (Optional)
If you want to remove all user-specific configuration and cache files created by Blender, use the following commands:
rm -rf $HOME/.config/blender
rm -rf $HOME/.cache/blender
⚠️ Note: This step is optional. Once deleted, your Blender settings and preferences cannot be recovered.
Step 5: Reload the Menu
Finally, reload the menu so Blender is removed from the application list:
- Click the Menu button in the lower-left corner
- Click Reload menu
Uninstall Blender Installed from the Blender tarball (.tar.xz) File
If you installed Blender manually by downloading and extracting the tarball from the official Blender website, follow the steps below to completely remove it.
Step 1: Open a Terminal
You can open a terminal using one of the following methods:
- Click Menu in the left corner of the screen, then click Terminal
- Click the Terminal icon in the Tray
- Press Ctrl + Alt + T
Step 2: Remove the Blender Directory
Delete the directory where Blender was installed:
sudo rm -rf /opt/blenderStep 3: Remove the Symbolic Link
Remove the symbolic link that was created to run Blender from the terminal:
sudo rm -f /usr/bin/blenderStep 4: Remove the Desktop Entry
Delete the desktop entry so Blender no longer appears in your application menu:
sudo rm -f /usr/share/applications/blender.desktopStep 5: Remove User Data (Optional)
If you want to remove all your Blender settings and cache data, use:
rm -rf $HOME/.config/blender
rm -rf $HOME/.cache/blender
Step 6: Reload the Menu
After removing all related files, refresh the menu so Blender no longer appears:
- Click the Menu button in the lower-left corner
- Click Reload menu
Conclusion
Blender is a powerful and versatile 3D creation suite that runs smoothly on FunOS. Whether you choose to install it from the Ubuntu repositories for simplicity and stability, or from the official Blender website to get the latest version, both methods are straightforward and effective. If you ever need to remove Blender, the uninstallation steps are just as easy to follow. With this guide, you can confidently manage Blender on FunOS — from installation to removal — and enjoy a flexible, open-source environment for your creative projects.