If you’re looking for a lightweight, fast, and privacy-focused web browser, Midori is a great option to consider. It is ideal for older computers or users who prefer minimal resource consumption while browsing. In this article, we will walk you through the complete steps to install Midori on FunOS, as well as how to uninstall it if needed. Whether you’re a beginner or an experienced Linux user, this guide will help you set up Midori smoothly on your system.
What is Midori?
Midori is a lightweight, open-source web browser that emphasizes speed, simplicity, and privacy. Originally developed by Christian Dywan and now maintained by the Astian Foundation, Midori is designed to be fast and efficient with a small memory footprint. It supports modern web standards and offers features like private browsing, ad blocking, and user-friendly tab management.
Midori is based on the WebKit rendering engine, the same engine used by browsers like Safari. It’s available across multiple platforms, including Linux, Windows, and Android, making it a versatile option for those who want consistency in browsing across devices.

How to Install Midori on FunOS
Work on: 22.04.5 ✅ | 24.04.4 ✅ | 25.10 ✅ | 26.04 ✅
Follow the steps below to install the Midori browser on FunOS:
Step 1: Download the Midori .deb File
1. Open your current browser and go to the official Midori for Linux download page:
https://astian.org/midori-browser/linux/
2. Scroll to the “Select Linux Distro” section.
3. Choose “Debian 64bits” from the dropdown menu.
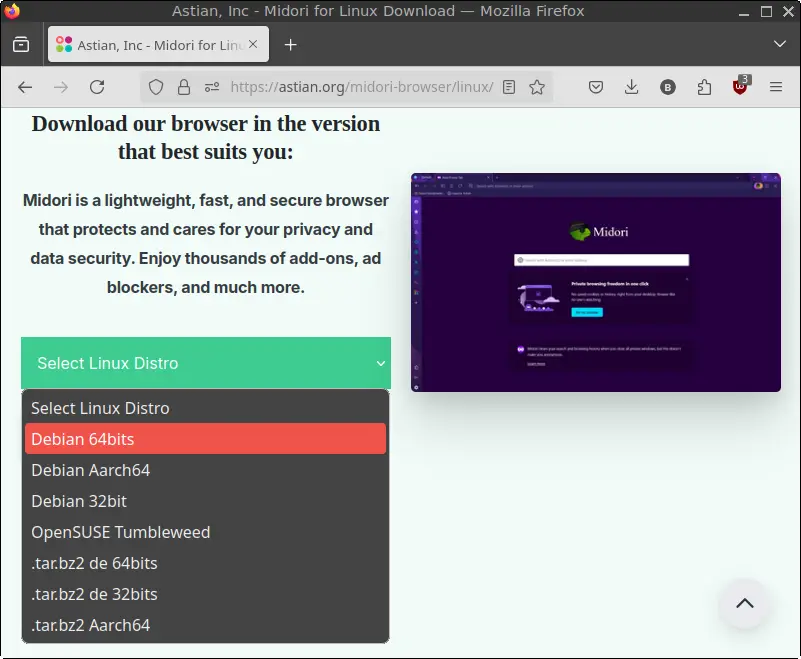
4. Download the .deb package file and save it in your Downloads directory.
Step 2: Open a Terminal
You can open the terminal in any of the following ways:
- Click the Menu button in the bottom-left corner of your screen, then select Terminal.
- Click the Terminal icon in the tray.
- Use the keyboard shortcut Ctrl + Alt + T.
Step 3: Navigate to the Downloads Directory
In the terminal, run:
cd ~/DownloadsThis changes your working directory to where the downloaded file is located.
Step 4: Update the Package List
Before installing, it’s good practice to update your package list:
sudo apt updateEnter your password if prompted.
Step 5: Install Midori
Now, install the Midori package using the following command:
sudo apt install ./midori_*.debThis command installs the .deb file from your current directory.
Step 6: Remove the Downloaded .deb File
After installation, you can safely remove the installer file:
rm -f midori_*.debThis helps keep your Downloads directory clean.
Step 7: Reload the Menu
To make sure Midori appears in your application menu:
- Click the Menu button in the bottom-left corner.
- Click Reload menu.
Launching Midori
To start using Midori:
- Click the Menu button in the bottom-left corner of your screen.
- Go to the Internet category.
- Click Midori Next Generation.
Midori will launch and you can start browsing right away!
How to Uninstall Midori on FunOS
If you no longer need Midori, follow these steps to remove it completely from your system:
Step 1: Open a Terminal
Open the terminal as described earlier.
Step 2: Remove Midori
To uninstall the Midori package:
sudo apt remove --purge midoriThis command removes Midori and its configuration files.
Step 3: Remove Any Unused Dependencies
Clean up any unnecessary dependencies left behind:
sudo apt autoremove --purgeStep 4: Remove User Data (Optional)
If you want to completely erase all Midori data for your user:
rm -rf $HOME/.cache/midori
rm -rf $HOME/.midori
Use this step only if you’re sure you don’t need your Midori browsing history, cache, or settings.
Step 5: Reload the Menu
Update your application menu to reflect the removal:
- Click the Menu button in the bottom-left corner.
- Click Reload menu.
Conclusion
Midori is a simple yet powerful browser that works great on lightweight systems like FunOS. Whether you’re looking for a resource-friendly browser or want an alternative to mainstream options, Midori delivers excellent performance with a clean interface. By following the steps in this article, you can easily install or uninstall Midori on FunOS.