If you’re a FunOS user who needs to type in Japanese, this guide will show you how to enable Japanese input using Fcitx (Flexible Context-aware Input Tool with eXtension). Fcitx is a lightweight and powerful input method framework, and with the Mozc engine (developed by Google), you can easily switch between English and Japanese typing.
This tutorial is ideal if you’ve set your system language to English but want to occasionally write emails, documents, or messages in Japanese.
What is Fcitx?
Fcitx (Flexible Input Method Framework) is a widely used input method for Unix-like systems. It supports many languages and is known for its speed, lightweight footprint, and ease of configuration.
Mozc is a Japanese input method developed by Google, based on Google Japanese Input. It provides accurate predictions, kana-kanji conversion, and more.
What You’ll Be Doing
- Installing Fcitx and Mozc
- Configuring the system to use Fcitx as the default input method framework
- Adding Japanese input (Mozc)
- Learning how to switch between English and Japanese input
Step-by-Step: Enable Japanese Input on FunOS Using Fcitx
Step 1: Open a Terminal
You can open the terminal using any of these methods:
- Click the Menu in the bottom-left corner and select Terminal
- Click the Terminal icon in the Tray
- Press
Ctrl + Alt + Ton your keyboard
Step 2: Update the Package List
Run the following command to make sure your package list is up to date:
sudo apt updateStep 3: Install Fcitx
To install the Fcitx input framework, run:
sudo apt install fcitxStep 4: Install Fcitx Mozc (Japanese Input Engine)
Next, install fcitx-mozc, which is the Japanese input method for Fcitx:
sudo apt install fcitx-mozcStep 5: Reload the Menu
After installing new software, reload the menu so new items like “Fcitx Configuration” will appear.
- Click the Menu button (bottom-left corner)
- Click Reload menu
Step 6: Set Fcitx as Your Input Method Framework
You need to configure the system to use Fcitx instead of the default input method framework.
1. Go to Menu > Settings > Input Method
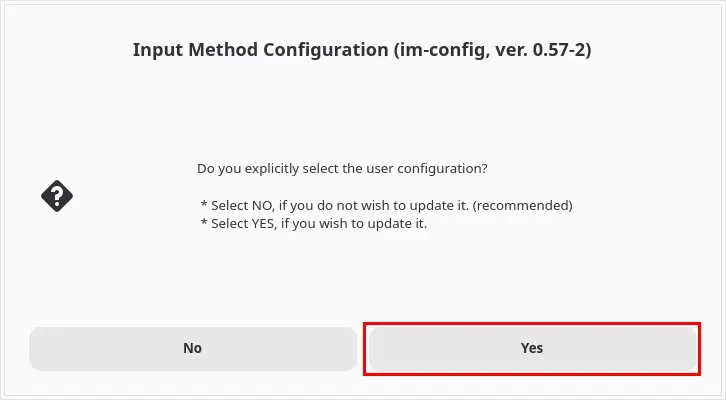
2. Click OK when prompted (this opens im-config)

3. Click Yes to proceed
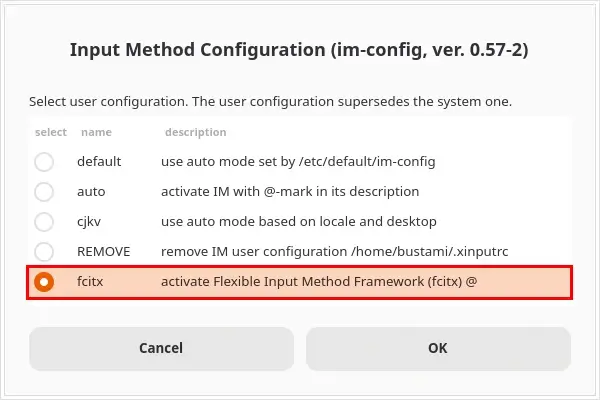
4. From the list, select fcitx, then click OK
5. Click OK again to confirm
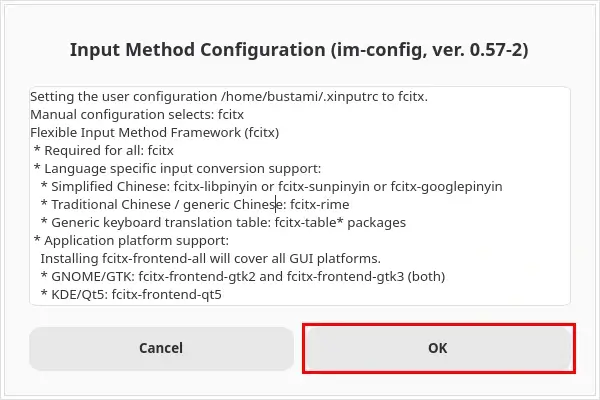
This will set the necessary environment variables to use Fcitx at login.
Step 7: Log Out and Log Back In
For the changes to take effect:
- Go to
Menu > Log Out > Log out - Then log back in
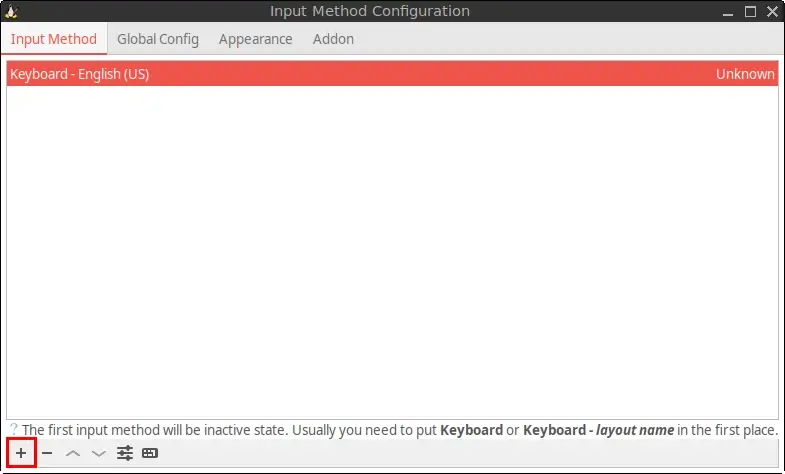
Step 8: Configure Fcitx and Add Mozc
Now you’ll set up Japanese input within the Fcitx framework.
1. Go to Menu > Settings > Fcitx Configuration
2. In the Input Method list, click the + button
3. Uncheck “Only Show Current Language”
4. Search for mozc and add it
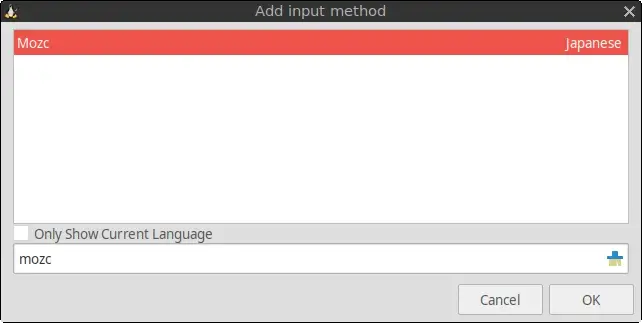
5. Close the configuration window
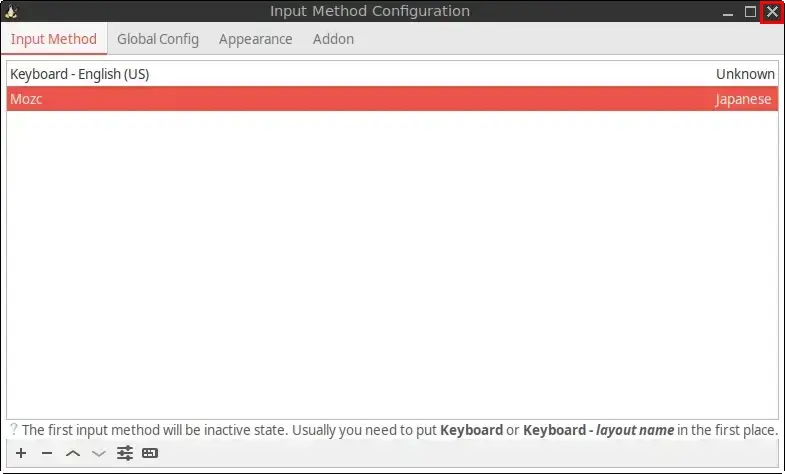
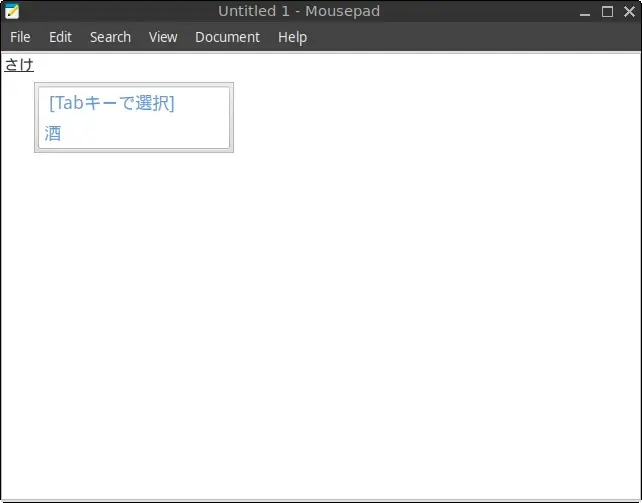
You should now see “Mozc” in the input method list, meaning Japanese input is enabled.
Step 9: Switch Between English and Japanese Input
You can now toggle between English and Japanese by pressing:
Ctrl + Space
Or whichever shortcut is configured in the Fcitx preferences. You can customize the shortcut by clicking the Global Config tab in the Fcitx Configuration window.
Conclusion
You’ve successfully set up Japanese input on FunOS using Fcitx and Mozc. This setup allows you to easily switch between English and Japanese typing, making your FunOS system flexible for multilingual work.