Eclipse IDE is a versatile and popular integrated development environment (IDE) widely used by developers for writing, testing, and deploying code in multiple programming languages. This guide walks you through installing, using, and uninstalling Eclipse IDE on FunOS, ensuring you have all the tools to get started with your development projects.
What is Eclipse IDE?
Eclipse IDE is a robust and extensible development environment initially designed for Java programming but has grown to support various other languages like C, C++, PHP, and Python through its plugin system. With its user-friendly interface and powerful debugging capabilities, Eclipse is a go-to IDE for professional and hobbyist developers. Its modular design enables developers to tailor it to specific project requirements, making it an indispensable tool in software development.
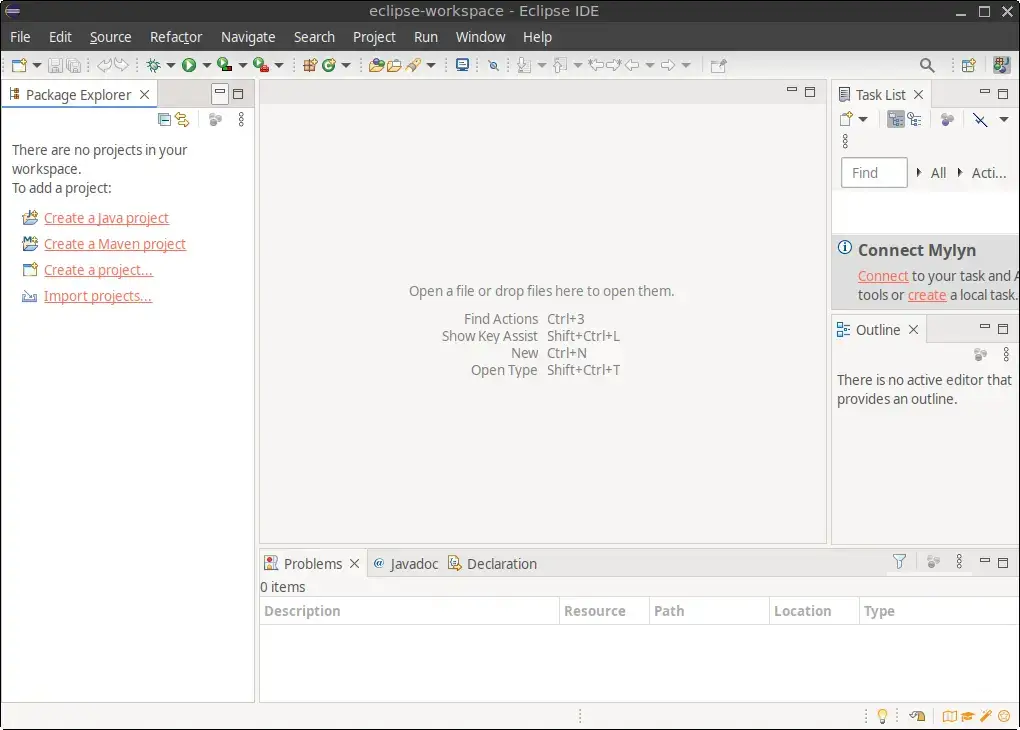
How to Install Eclipse IDE on FunOS
Work on: 22.04.5 ✅ | 24.04.3 ✅ | 25.04 ✅ | 25.10 ✅ | 26.04 ✅
Step 1: Download the Eclipse IDE .tar.gz File
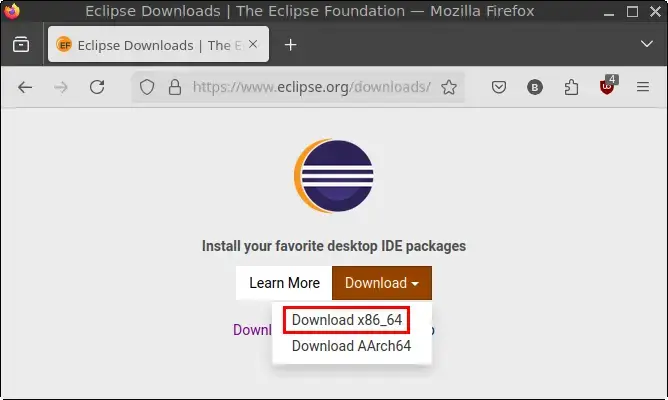
Visit the Eclipse IDE download page. Click the Download x86_64.
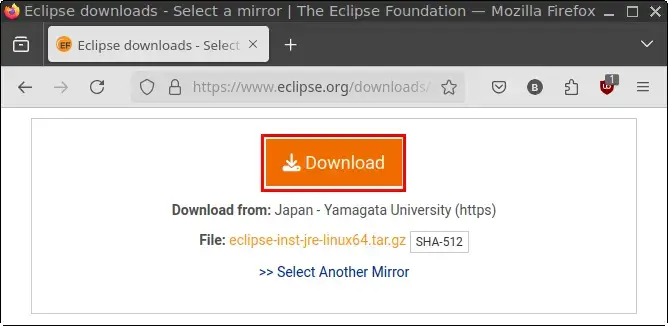
On the new page that appears, click Download to start downloading the .tar.gz file. Save the file to your Downloads directory.
Step 2: Open a Terminal
There are three ways to open the Terminal:
- Click the Menu in the lower-left corner of the screen, then click Terminal.
- Click the Terminal icon in the Tray.
- Use the keyboard shortcut Ctrl + Alt + T.
Step 3: Navigate to the Downloads Directory
Navigate to the directory where the downloaded file is stored:
cd ~/DownloadsStep 4: Extract the tar.gz File
Extract the Eclipse IDE .tar.gz file:
tar -xvf eclipse-*.tar.gzStep 5: Navigate to the Extracted Directory
Navigate to the extracted directory:
cd eclipse-installerStep 6: Run the Installer
Run the Eclipse installer:
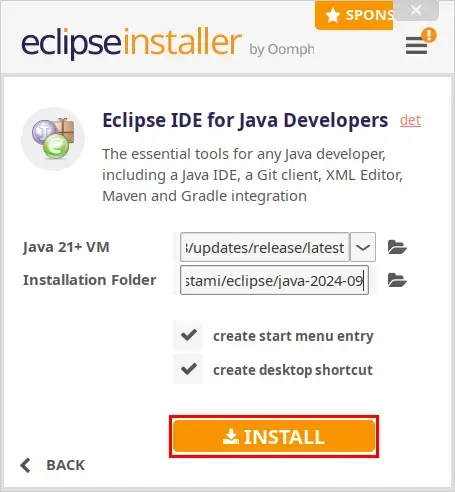
./eclipse-instSelect Eclipse IDE that fits your needs.
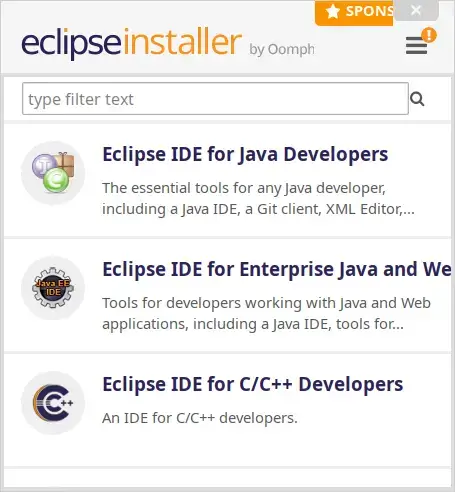
Confirm the Java 21+ VM option and the installation location, then click INSTALL.
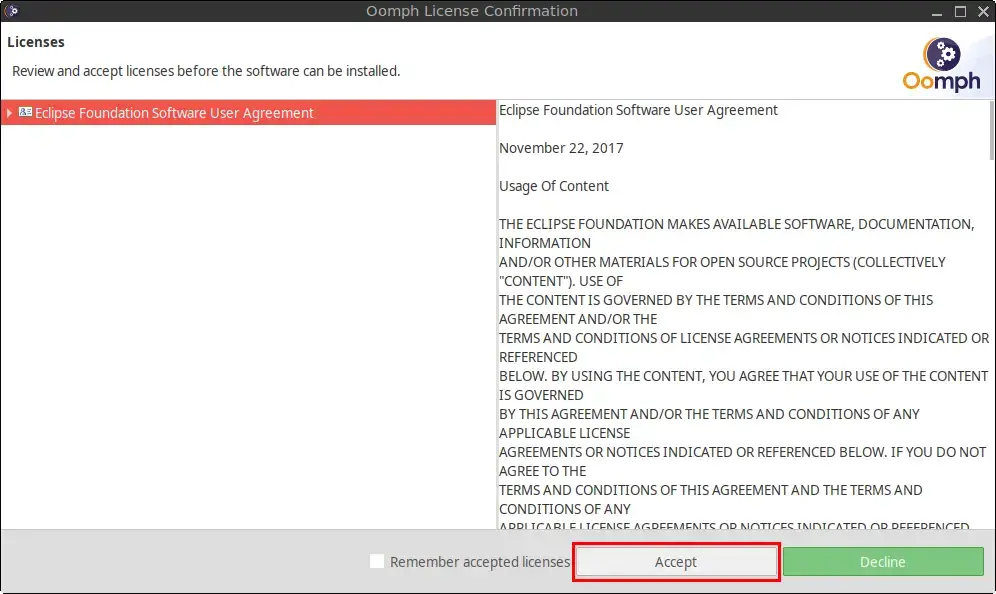
Accept the Oomph License Confirmation by clicking Accept.
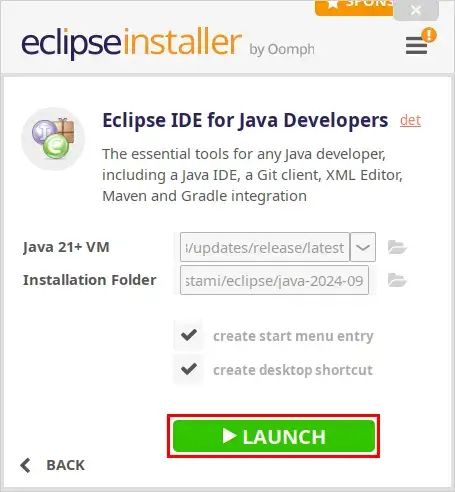
After the installation is complete, click LAUNCH.
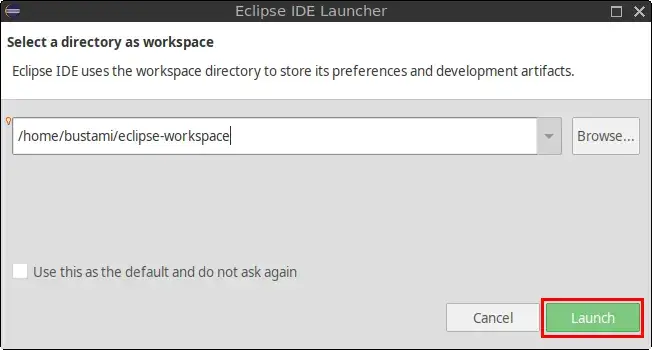
Set your preferred workspace directory, then click Launch.
Step 7: Remove the Downloaded .tar.gz File
Once the installation is complete, remove the .tar.gz file to free up space:
rm -f ~/Downloads/eclipse-*.tar.gzStep 8: Reload the Menu
Reload the FunOS menu to display the newly installed application:
- Click the Menu button in the lower-left corner.
- Click Reload menu.
Launching Eclipse IDE
To launch Eclipse IDE:
- Click the Menu button in the lower-left corner.
- Navigate to the Development category, where you’ll find Eclipse IDE.
How to Uninstall Eclipse IDE on FunOS
If you no longer need Eclipse IDE, follow these steps to uninstall it completely.
Step 1: Open a Terminal
Open the Terminal using any of the methods mentioned above.
Step 2: Remove the eclipse-installer Directory
Delete the extracted installation directory:
rm -rf $HOME/Downloads/eclipse-installerStep 3: Remove the Desktop Entry
Remove the desktop entry files:
rm -f $HOME/.local/share/applications/epp.package.java.desktop
rm -f $HOME/.local/share/applications/*_eclipse-installer_.desktop
Step 4: Remove User Data (Optional)
Delete Eclipse-related data and workspace directories:
rm -rf $HOME/.eclipse
rm -rf $HOME/eclipse
rm -rf $HOME/eclipse-workspace
Step 5: Reload the Menu
Reload the FunOS menu to remove Eclipse IDE entries:
- Click the Menu button in the lower-left corner.
- Click Reload menu.
Conclusion
Eclipse IDE is a powerful tool for developers, offering a wide range of features and support for multiple programming languages. By following the steps in this guide, you can easily install and configure Eclipse IDE on FunOS to meet your development needs. If you decide to switch to another IDE, this guide also includes steps to completely uninstall Eclipse IDE, ensuring your system remains clean and organized.
Happy coding!

Leave a Reply