JetBrains Toolbox is a powerful tool that simplifies the installation and management of JetBrains IDEs such as IntelliJ IDEA, PyCharm, WebStorm, and more. In this article, we will guide you through the steps to install JetBrains Toolbox on FunOS and properly uninstall it if needed.
What is JetBrains Toolbox?
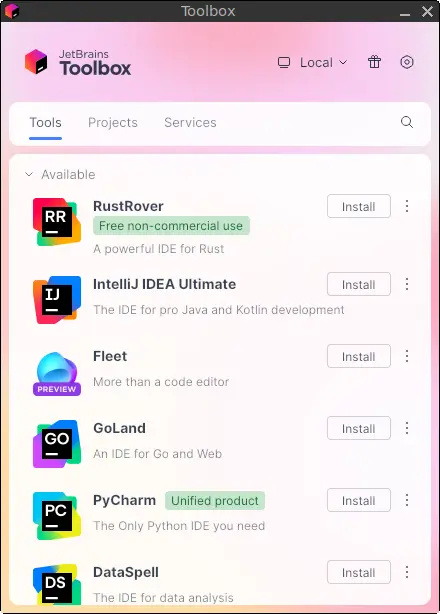
JetBrains Toolbox is a desktop application developed by JetBrains to help users manage their JetBrains IDEs. It provides an intuitive interface where you can:
- Install and update JetBrains IDEs like IntelliJ IDEA, PyCharm, CLion, WebStorm, etc.
- Launch your projects quickly
- Manage multiple versions of each IDE
- Access your JetBrains account and licenses
- Automatically configure desktop entries and update the system menu
JetBrains Toolbox runs quietly in the background and makes managing JetBrains development tools seamless and centralized.
How to Install JetBrains Toolbox on FunOS
Work on: 22.04.5 ✅ | 24.04.4 ✅ | 25.04 ✅ | 25.10 ✅ | 26.04 ✅
Follow these steps to install JetBrains Toolbox on your FunOS system.
Step 1: Open a Terminal
You can open a terminal in FunOS using one of the following methods:
- Click the Menu button in the lower-left corner of the screen, then click Terminal
- Click the Terminal icon in the Tray
- Press Ctrl + Alt + T on your keyboard
Step 2: Install JetBrains Toolbox
In the terminal, run the following command to download and install JetBrains Toolbox using a community-provided script:
curl -fsSL https://raw.githubusercontent.com/funos-linux/jetbrains-toolbox-install/master/jetbrains-toolbox.sh | bashThis script will:
- Automatically download the latest version of JetBrains Toolbox
- Extract and install it in
~/.local/share/JetBrains/Toolbox - Create a symbolic link in
~/.local/bin/jetbrains-toolbox
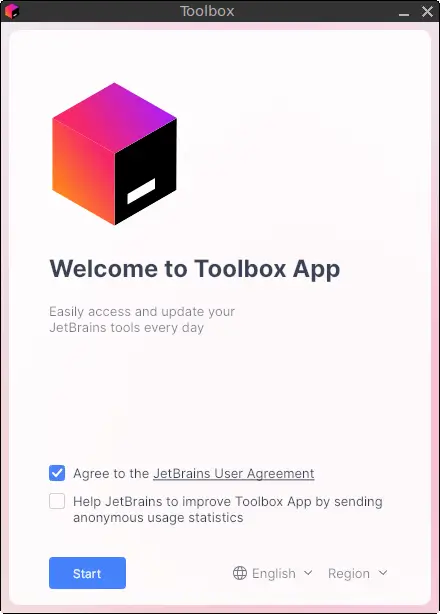
Check “Agree to the JetBrains User Agreement” then click the Start button.
Step 3: Reload the Menu
After installation, the Toolbox launcher may not immediately appear in the JWM menu. To fix this:
- Click the Menu button in the lower-left corner
- Click Reload menu
Launching JetBrains Toolbox
After installation, to open JetBrains Toolbox:
- Click the Menu button in the lower-left corner
- Go to the Development category
- Click on JetBrains Toolbox
Note: After installing a JetBrains IDE (e.g., IntelliJ, PyCharm) through the Toolbox app, don’t forget to Reload the menu again. This step ensures the newly installed IDE appears in the JWM menu.
How to Uninstall JetBrains Toolbox on FunOS
If you no longer wish to use JetBrains Toolbox, follow these steps to completely remove it from your system.
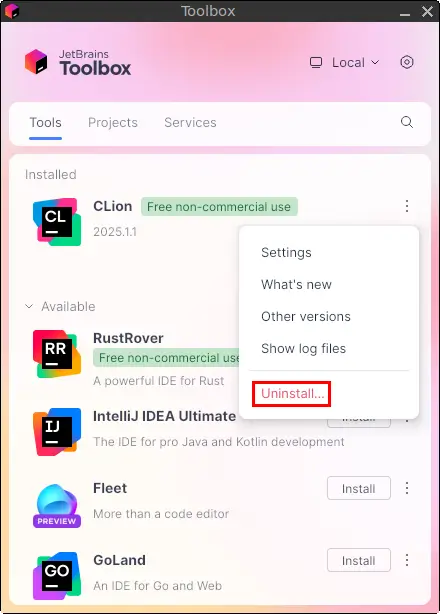
Step 1: Uninstall All Tools/IDEs Installed via Toolbox
Open JetBrains Toolbox and uninstall all installed IDEs (e.g., IntelliJ IDEA, PyCharm) to clean up space and config files.
Step 2: Open a Terminal
Open the terminal using Menu, Tray icon, or Ctrl + Alt + T.
Step 3: Remove the Toolbox Binary and Installation Directory
rm -rf $HOME/.local/share/JetBrains/ToolboxStep 4: Remove the Symbolic Link
rm -f $HOME/.local/bin/jetbrains-toolboxStep 5: Remove Autostart Entry
rm -f $HOME/.config/autostart/jetbrains-toolbox.desktopStep 6: Remove the Desktop Entry
rm -f $HOME/.local/share/applications/jetbrains-toolbox.desktopStep 7: (Optional) Remove Toolbox Settings and Cache
This step will remove all JetBrains-related configuration and cache files. Do this only if you do not plan to use any JetBrains product.
rm -rf $HOME/.local/share/JetBrains
rm -rf $HOME/.config/JetBrains
rm -rf $HOME/.cache/JetBrains
rm -rf $HOME/.java
Step 8: Reload the Menu
- Click the Menu button in the lower-left corner
- Click Reload menu
Conclusion
JetBrains Toolbox is a convenient utility for managing all JetBrains development tools on FunOS. With just a simple terminal command, you can install it and start managing your favorite IDEs. It integrates well with the FunOS desktop environment. If you ever need to uninstall it, you now have a complete guide to remove all associated files and settings.
Have fun coding with your favorite JetBrains tools on FunOS!