In today’s digital world, online privacy and security are becoming increasingly important. Many users want to protect their personal data, hide their IP address, and browse the internet safely on public networks. One of the most trusted tools for achieving this is Mullvad VPN.
In this article, you will learn how to install, launch, and uninstall Mullvad VPN on FunOS step by step. The process is simple and can be done entirely through the Terminal.
What is Mullvad VPN?
Mullvad VPN is a privacy-focused virtual private network service based in Sweden. It is known for its strong commitment to anonymity and security. Unlike most VPNs, Mullvad does not require an email address or personal information when you create an account — you simply receive a random account number that serves as your login ID.
Mullvad uses modern VPN protocols such as WireGuard and OpenVPN (although OpenVPN support will end on January 15, 2026). The service runs on RAM-only servers, ensuring that no user data is stored permanently. It also implements DAITA (Defense Against AI-guided Traffic Analysis), a unique system that minimizes traffic pattern recognition to further protect user privacy.
The price is straightforward — €5 per month — with no special plans, no promotions, and no tracking. Mullvad accepts various payment methods including credit card, PayPal, Bitcoin, Monero, and even cash sent by mail.
In short, Mullvad VPN is ideal for users who value transparency, simplicity, and strong privacy protection.
How to Install Mullvad VPN on FunOS
Work on: 22.04.5 ✅ | 24.04.4 ✅ | 25.04 ✅ | 25.10 ✅ | 26.04 ✅
Follow these steps to install Mullvad VPN on your FunOS system.
Step 1: Open a Terminal
You can open the Terminal in one of the following ways:
- Click the Menu in the lower-left corner of the screen, then click Terminal.
- Click the Terminal icon in the Tray.
- Press Ctrl + Alt + T on your keyboard.
Step 2: Update the Package List
Before installing new software, it’s good practice to update the package list so that your system knows about the latest available packages.
sudo apt updateStep 3: Install the Necessary Dependencies
Install the required packages that allow the system to download and verify software from HTTPS repositories.
sudo apt install apt-transport-https curlStep 4: Add the GPG Key
The GPG key ensures that the packages you install are authentic and come directly from Mullvad’s repository.
sudo curl -fsSLo /usr/share/keyrings/mullvad-keyring.asc https://repository.mullvad.net/deb/mullvad-keyring.ascStep 5: Add the Repository
Add the official Mullvad repository to your system’s sources list.
echo "deb [signed-by=/usr/share/keyrings/mullvad-keyring.asc arch=$( dpkg --print-architecture )] https://repository.mullvad.net/deb/stable stable main" | sudo tee /etc/apt/sources.list.d/mullvad.listStep 6: Update the Package List Again
After adding the repository, update the package list once more to include Mullvad’s packages.
sudo apt updateStep 7: Install Mullvad VPN
Now, install the Mullvad VPN package.
sudo apt install mullvad-vpnStep 8: Reload the Menu
After installation, you need to refresh the JWM menu so that Mullvad VPN appears in the list.
- Click the Menu button in the lower-left corner.
- Click Reload menu.
Launching Mullvad VPN
To launch Mullvad VPN:
- Click the Menu button in the lower-left corner.
- Go to the Internet section.
- Click Mullvad VPN.
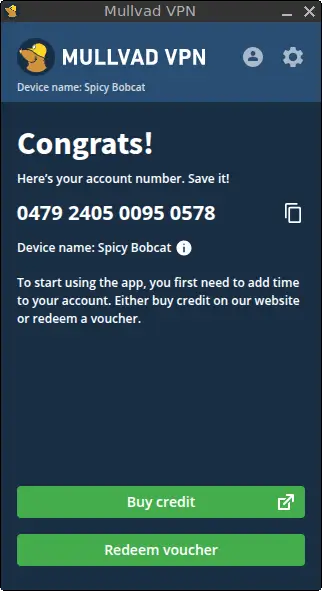
Once launched, you can log in using your Mullvad account number. After connecting, your internet traffic will be encrypted and routed through Mullvad’s secure servers.
How to Uninstall Mullvad VPN on FunOS
If you no longer need Mullvad VPN, you can remove it completely by following these steps.
Step 1: Open a Terminal
Use one of the same methods described earlier to open a Terminal.
Step 2: Remove Mullvad VPN
Uninstall the Mullvad VPN package and remove its configuration files.
sudo apt remove --purge mullvad-vpnStep 3: Remove Any Unused Dependencies
Clean up any packages that are no longer needed.
sudo apt autoremove --purgeStep 4: Remove the Repository and Key (Optional)
If you want to remove all traces of the Mullvad repository from your system:
sudo rm -f /etc/apt/sources.list.d/mullvad.list
sudo rm -f /usr/share/keyrings/mullvad-keyring.asc
Step 5: Update the Package List
Refresh your system’s package list again to reflect the changes.
sudo apt updateStep 6: Remove User Data (Optional)
If you want to completely remove Mullvad’s configuration files and settings from your home directory:
rm -rf $HOME/.config/Mullvad\ VPNStep 7: Reload the Menu
Finally, refresh the JWM menu again.
- Click the Menu button in the lower-left corner.
- Click Reload menu.
Conclusion
Mullvad VPN is one of the most privacy-oriented VPN services available today. With anonymous account creation, strong encryption, RAM-only servers, and transparent policies, it provides a solid foundation for secure and private internet access.
By following the steps above, you can easily install and use Mullvad VPN on FunOS, or remove it completely if you no longer need it. Whether you’re protecting your online identity or simply want a safer browsing experience, Mullvad VPN is an excellent choice for FunOS users.