Nextcloud is a powerful self-hosted cloud storage solution that lets you securely sync and share your files, calendars, contacts, and more across multiple devices. If you’re using FunOS and want to access your Nextcloud files directly from your desktop, installing the Nextcloud Desktop client is a great option. This article will guide you through the steps to install, use, and uninstall Nextcloud Desktop on FunOS.
What is Nextcloud Desktop?
Nextcloud Desktop is the official sync client for the Nextcloud cloud storage platform. It allows users to synchronize files between their Nextcloud server and their local machine. With it, you can:
- Automatically keep selected folders in sync between your device and the cloud.
- Access your cloud files directly from your file manager.
- Receive notifications for shared files and sync issues.
The Nextcloud Desktop client integrates smoothly into your desktop environment and is ideal for individuals and teams who need seamless file access and backup across devices.
How to Install Nextcloud Desktop on FunOS
Work on: 22.04.5 ✅ | 24.04.3 ✅ | 25.04 ✅ | 25.10 ✅ | 26.04 ❌
Step 1: Open a Terminal
There are three ways to open a Terminal in FunOS:
- Click the Menu button in the lower-left corner of the screen, then click Terminal.
- Click the Terminal icon in the Tray (usually located at the bottom or side of the screen).
- Use the keyboard shortcut Ctrl + Alt + T.
Step 2: Add the XtraDeb PPA
The XtraDeb PPA provides newer desktop software for Ubuntu-based systems, including FunOS.
Run the following command in the Terminal:
sudo add-apt-repository ppa:xtradeb/appsStep 3: Update the Package List
After adding the PPA, refresh your package list so that the system recognizes the new repository:
sudo apt updateStep 4: Install Nextcloud Desktop
Now, install the Nextcloud Desktop client by entering:
sudo apt install nextcloud-desktopThis will download and install the necessary packages.
Step 5: Reload the Menu
After installation, you may need to reload the application menu to see the new entry:
- Click the Menu button in the lower-left corner.
- Click Reload menu.
Launching Nextcloud Desktop
To start Nextcloud Desktop:
- Click the Menu button in the lower-left corner of the screen.
- Navigate to the Accessories category.
- Click on Nextcloud Desktop to launch the application.
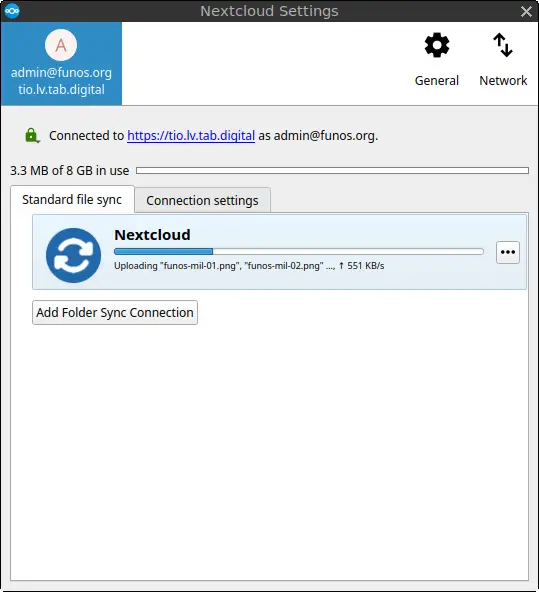
You’ll be prompted to connect to your Nextcloud server by entering the server address and logging in. Once configured, your files will begin syncing in the background.
How to Uninstall Nextcloud Desktop on FunOS
If you no longer need the Nextcloud Desktop client, follow the steps below to uninstall it completely from your system.
Step 1: Open a Terminal
Use one of the three methods described earlier to open a Terminal.
Step 2: Remove Nextcloud Desktop
Uninstall the application by running:
sudo apt remove --purge nextcloud-desktopThe --purge option ensures that configuration files are also removed.
Step 3: Remove Any Unused Dependencies
Clean up packages that were installed automatically but are no longer needed:
sudo apt autoremove --purgeStep 4: Remove the XtraDeb PPA
To remove the repository that was added earlier:
sudo add-apt-repository --remove ppa:xtradeb/appsStep 5: Update the Package List
Update your package list again to reflect the removal of the PPA:
sudo apt updateStep 6: Remove User Data (Optional)
If you want to completely remove all user data related to Nextcloud Desktop:
rm -rf $HOME/.cache/Nextcloud
rm -rf $HOME/.config/Nextcloud
rm -rf $HOME/.local/share/Nextcloud
⚠️ Warning: This will delete all locally stored Nextcloud sync settings and cache data. Make sure you’ve backed up anything important.
Step 7: Reload the Menu
To clean up the menu after removal:
- Click the Menu button in the lower-left corner.
- Click Reload menu.
Conclusion
Installing the Nextcloud Desktop client on FunOS is simple and straightforward. By following the steps above, you can easily connect your FunOS machine to your Nextcloud server and start syncing files securely. The client integrates well with FunOS’s lightweight environment and ensures that your data is always accessible and up-to-date.
If you later decide to remove Nextcloud Desktop, the uninstallation steps provided will help you cleanly remove the software and all associated files. Enjoy secure and private file sync with Nextcloud on FunOS!
Leave a Reply