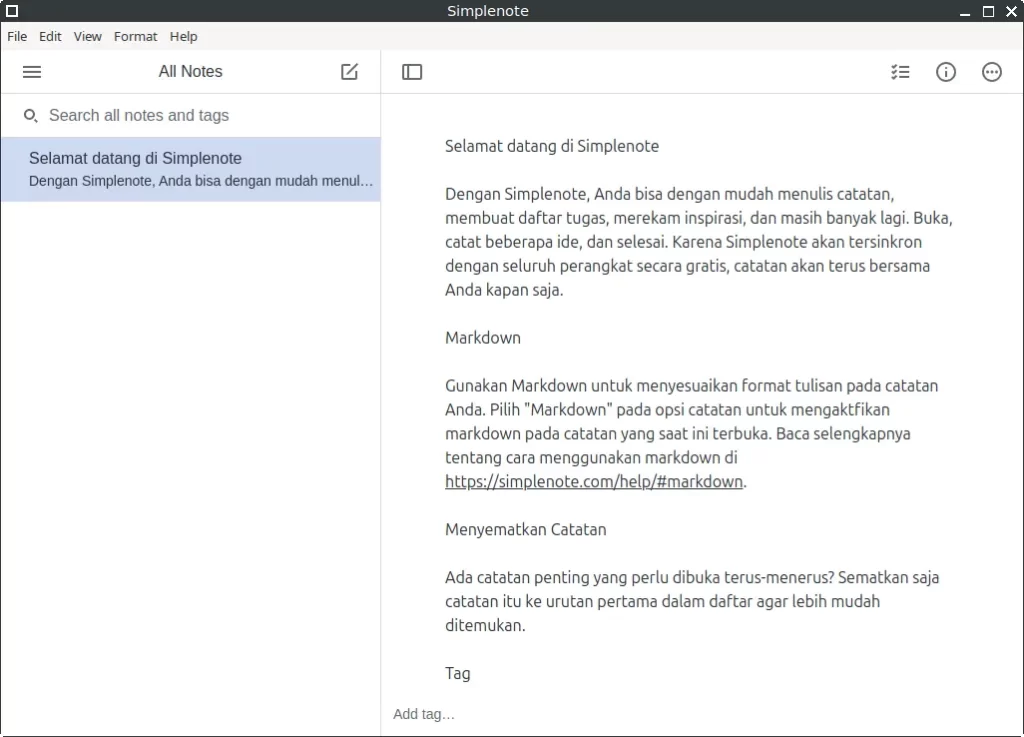
Simplenote is a lightweight and powerful note-taking application that focuses on speed, simplicity, and seamless synchronization across devices. Whether you want to write ideas, manage to-do lists, or keep important notes organized, Simplenote offers a clean and distraction-free experience. In this article, you will learn how to install Simplenote on FunOS using two different methods, including the official .deb package and the .tar.gz archive from the developers.
What is Simplenote?
Simplenote is a free, cross-platform note-taking app developed by Automattic, the company behind WordPress.com. It is designed to be fast, minimal, and easy to use, while still offering useful features such as cloud synchronization, Markdown support, tags for note organization, version history, and availability on Linux, Windows, macOS, Android, and iOS. Because it syncs automatically, your notes stay updated across all your devices.
How to Install Simplenote on FunOS
Method 1: Using the .deb Package from the Simplenote Official GitHub
This is the easiest method to install Simplenote on FunOS. The .deb package works well on systems based on Ubuntu, including FunOS.
Step 1: Download the Simplenote .deb File
Before installing Simplenote, you need to download the .deb installer from its official GitHub page.
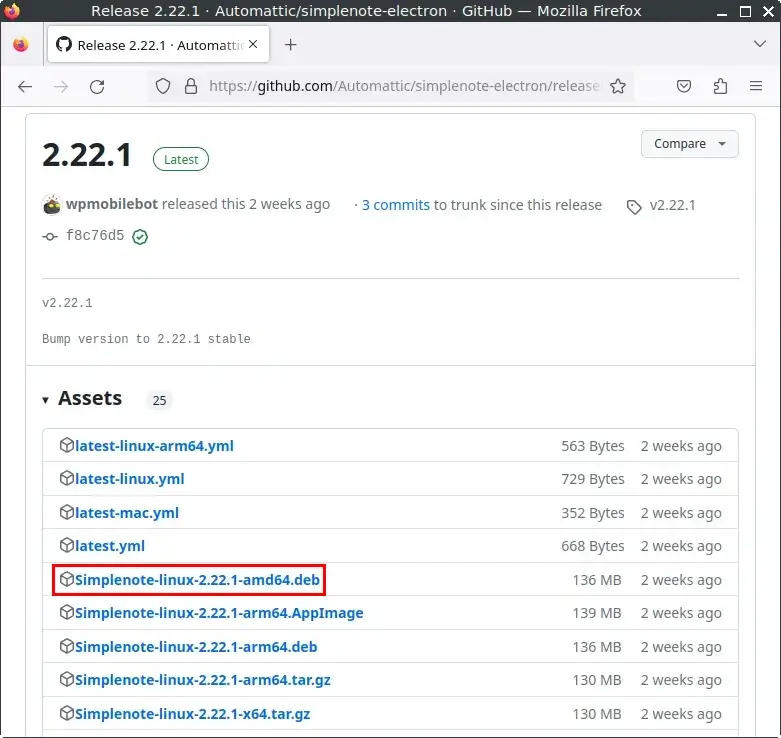
- Open your browser and go to the Simplenote Releases Page on GitHub:
(https://github.com/Automattic/simplenote-electron/releases/latest) - Scroll down to the Assets section.
- Download the file named
Simplenote-linux-x.x.x-amd64.deb(version numbers may vary). - Save the file in your Downloads directory.
Step 2: Open a Terminal
You can open the Terminal using one of these methods:
- Click Menu in the lower-left corner, then click Terminal
- Click the Terminal icon in the Tray
- Press Ctrl + Alt + T on your keyboard
Step 3: Navigate to the Downloads Directory
Use the following command to move into your Downloads folder:
cd ~/DownloadsStep 4: Update the Package List
Before installing any .deb file, it’s recommended to update your package list:
sudo apt updateStep 5: Install Simplenote
Use this command to install the downloaded .deb package:
sudo apt install ./Simplenote-linux-*.debThis command automatically installs Simplenote along with any necessary dependencies.
Step 6: Remove the Downloaded .deb File
Once the installation is complete, you can safely remove the installer file:
rm -f Simplenote-linux-*.debStep 7: Reload the Menu
After installing an application in FunOS, you need to reload the menu so the new application appears.
- Click the Menu button in the lower-left corner
- Click Reload menu
Method 2: Using the .tar.gz Package from the Simplenote Official GitHub
If you prefer a manual installation method or want to run Simplenote without using a .deb package, you can install it using the .tar.gz archive. This method gives you full control over where the application is stored and how it is launched.
Step 1: Download the Simplenote .tar.gz File
First, download the compressed archive containing the Simplenote application.
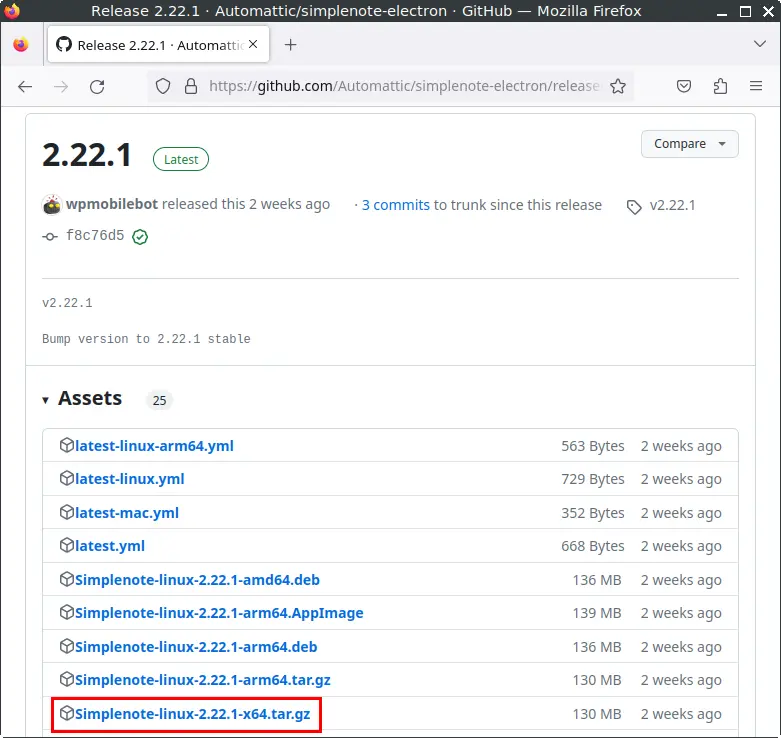
- Open your browser and go to the Simplenote Releases Page on GitHub:
(https://github.com/Automattic/simplenote-electron/releases/latest) - In the Assets section, download the file with the
.tar.gzextension. - Save the file inside your Downloads directory.
Step 2: Open a Terminal
To continue the installation, open a Terminal using any of these options:
- Click Menu in the lower-left corner of the screen, then click Terminal
- Click the Terminal icon in the Tray
- Press Ctrl + Alt + T
Step 3: Create the Simplenote Directory in /opt
Applications installed manually are usually placed under /opt. Create a directory for Simplenote:
sudo mkdir -p /opt/SimplenoteStep 4: Extract the .tar.gz File to the /opt/Simplenote Directory
Extract the downloaded archive into the directory you just created:
sudo tar -xvzf ~/Downloads/Simplenote-linux-*.tar.gz --strip-components=1 -C /opt/SimplenoteThe --strip-components=1 option removes the top-level folder inside the archive, placing all application files directly inside /opt/Simplenote.
Step 5: Create a Symbolic Link to the Simplenote Executable
Creating a shortcut (symlink) allows you to launch Simplenote by simply typing simplenote in the Terminal:
sudo ln -sf /opt/Simplenote/simplenote /usr/bin/simplenoteStep 6: Create a Desktop Entry for Simplenote
To make Simplenote appear in the FunOS application menu, you need to create a desktop entry.
1. Open the .desktop file in Mousepad:
sudo mousepad /usr/share/applications/simplenote.desktop2. Paste the following content into the file:
[Desktop Entry]
Name=Simplenote
Exec=/usr/bin/simplenote %U
Terminal=false
Type=Application
Icon=simplenote
StartupWMClass=Simplenote
Comment=Simplenote is an easy way to keep notes, lists, ideas and more. Your notes stay in sync with all your devices for free.
GenericName=Note Taking Application
StartupNotify=true
Categories=Utility;
MimeType=x-scheme-handler/simplenote;
3. Save the file and close Mousepad.
Step 7: Set Permissions for Chrome Sandbox
Electron-based applications often include a Chrome sandbox that requires special permissions to run properly. Set the correct permission:
sudo chmod 4755 /opt/Simplenote/chrome-sandboxStep 8: Remove the Downloaded File
After extraction, you can delete the .tar.gz file to free up space:
rm -f ~/Downloads/Simplenote-linux-*.tar.gzStep 9: Reload the Menu
Manually installed applications may not appear in the menu until you reload it.
- Click the Menu button in the lower-left corner
- Click Reload menu
Launching Simplenote
To start Simplenote:
- Click the Menu button in the lower-left corner
- Go to the Accessories category
- Click Simplenote
How to Uninstall Simplenote on FunOS
If you no longer need Simplenote or want to switch to another note-taking application, you can easily remove it from FunOS. The uninstallation steps depend on how you originally installed Simplenote. This section explains how to uninstall Simplenote — both when it was installed from the official .deb file and when it was installed from the .tar.gz archive.
Uninstall Simplenote Installed from the Simplenote .deb File
If you installed Simplenote using the official .deb package from GitHub, follow the steps below to remove it completely from your system.
Step 1: Open a Terminal
You can open the Terminal using any of these methods:
- Click Menu in the lower-left corner, then click Terminal
- Click the Terminal icon in the Tray
- Press Ctrl + Alt + T
Step 2: Remove Simplenote
Use the following command to remove Simplenote along with its configuration files:
sudo apt remove --purge simplenoteThe --purge option ensures that application-level configuration files are removed.
Step 3: Remove Any Unused Dependencies
After removal, you can clean up packages that were installed automatically but are no longer needed:
sudo apt autoremove --purgeStep 4: Remove User Data (Optional)
Simplenote stores user data—such as local note cache and settings—in your home directory. Removing it is optional, depending on whether you want a fully clean system.
To delete Simplenote user data:
rm -rf $HOME/.config/SimplenoteStep 5: Reload the Menu
Because FunOS uses JWM, you need to reload the menu so the Simplenote entry disappears.
- Click the Menu button in the lower-left corner
- Click Reload menu
Uninstall Simplenote Installed from the Simplenote .tar.gz File
If you installed Simplenote manually using the .tar.gz package, the removal process involves deleting the application directory, symbolic link, and desktop entry. Follow the steps below to completely remove Simplenote from your FunOS system.
Step 1: Open a Terminal
Open the Terminal using any of the following methods:
- Click Menu in the lower-left corner, then click Terminal
- Click the Terminal icon in the Tray
- Press Ctrl + Alt + T
Step 2: Remove the Simplenote Directory
Delete the directory where Simplenote was extracted:
sudo rm -rf /opt/SimplenoteThis removes all installed application files.
Step 3: Remove the Symbolic Link
Next, remove the symbolic link that allows you to launch Simplenote from the Terminal:
sudo rm -f /usr/bin/simplenoteStep 4: Remove the Desktop Entry
To remove Simplenote from the application menu, delete its desktop entry:
sudo rm -f /usr/share/applications/simplenote.desktopStep 5: Remove User Data (Optional)
If you want to remove all leftover Simplenote data, delete the configuration directory in your home folder:
rm -rf $HOME/.config/SimplenoteThis step is optional but ensures a fully clean removal.
Step 6: Reload the Menu
Finally, refresh the FunOS application menu so the Simplenote entry disappears.
- Click the Menu button in the lower-left corner
- Click Reload menu
Conclusion
Simplenote is a lightweight, fast, and reliable note-taking application that works well on FunOS, whether you prefer installing it through the official .deb package or manually using the .tar.gz archive. Both methods provide a smooth experience, and the steps in this guide ensure that you can install, launch, and remove Simplenote cleanly whenever needed.
By following the detailed instructions in this article, you can choose the installation method that best fits your workflow and have full control over how Simplenote is managed on your system. Whether you’re using it for quick notes, ideas, lists, or synced writing across devices, Simplenote offers a simple yet powerful way to stay organized on FunOS.
Leave a Reply