Warp Terminal is a modern terminal application designed to improve the command-line experience for developers, system administrators, and Linux enthusiasts. Unlike traditional terminal emulators, Warp Terminal provides an editor-like interface with features such as syntax highlighting, command blocks, AI-powered assistance, command history search, and an intuitive user interface that makes working in the terminal more productive.
Although Warp Terminal is not included with FunOS by default, you can easily install it from Warp’s official APT repository. This tutorial will guide you through the complete installation process, from adding the repository to launching Warp Terminal for the first time. It also includes instructions for completely uninstalling Warp Terminal if you decide to remove it later.
What is Warp Terminal?
Warp Terminal is a modern, AI-powered terminal application built to enhance the traditional command-line experience. It combines the speed and flexibility of a terminal emulator with features commonly found in modern code editors, making it easier to write, edit, and manage shell commands.
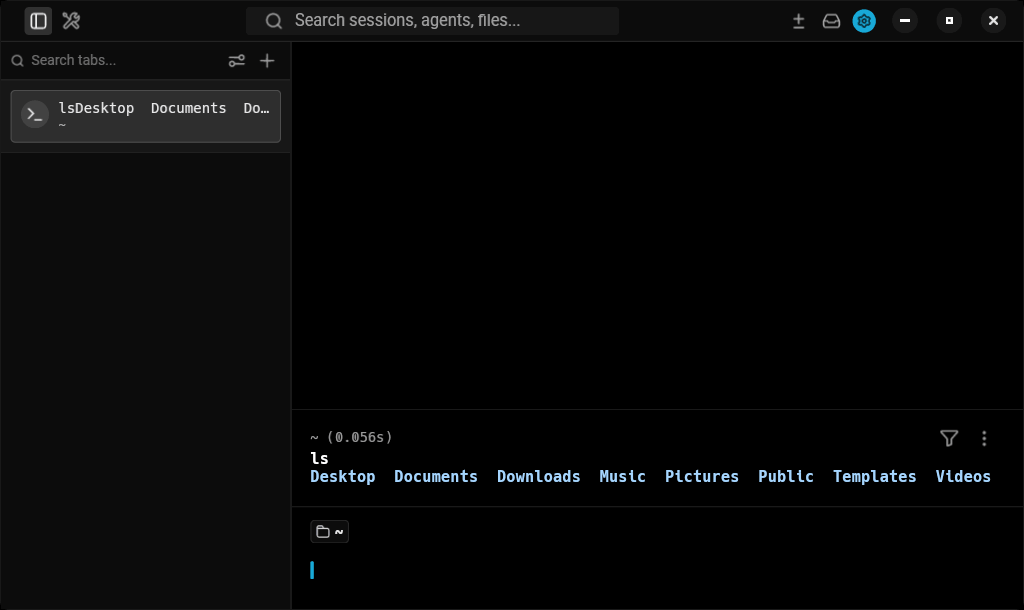
One of Warp Terminal’s most distinctive features is its block-based interface, where every executed command and its output are grouped into separate, easy-to-navigate blocks. This makes reviewing previous commands, copying output, and organizing long terminal sessions much more convenient than in traditional terminal applications.
Warp Terminal also includes intelligent command editing with syntax highlighting, multi-line editing, auto-completion, and built-in AI capabilities that can help generate shell commands, explain existing commands, and assist with development tasks. Recent versions also support AI coding agents and additional developer-focused features, making Warp Terminal more than just a traditional terminal emulator.
Warp Terminal is available for Linux, macOS, and Windows. On Linux, it officially supports Debian and Ubuntu-based distributions through its APT repository, making installation on FunOS straightforward.
How to Install Warp Terminal on FunOS
Work on: 22.04.5 ✅ | 24.04.4 ✅ | 25.10 ✅ | 26.04 ✅
Follow the steps below to install Warp Terminal on FunOS.
Step 1: Open a Terminal
First, open the Terminal application.
You can do this using any of the following methods:
- Click Menu in the lower-left corner of the screen, then click Terminal.
- Click the Terminal icon in the Tray.
- Press Ctrl + Alt + T on your keyboard.
Step 2: Update the Package List
Before installing new software, it is recommended to update the package list to ensure your system has the latest information about available packages.
Run the following command:
sudo apt updateWait until the update process finishes before continuing.
Step 3: Install the Necessary Dependencies
Warp Terminal’s repository requires several packages to securely download and verify software packages.
Install the required dependencies by running:
sudo apt install apt-transport-https curl wget gpgIf any of these packages are already installed, APT will simply skip them.
Step 4: Add the GPG Key
Next, download and install Warp’s official GPG signing key. This key allows APT to verify that packages downloaded from the Warp repository are authentic and have not been modified.
Run the following commands:
wget -qO- https://releases.warp.dev/linux/keys/warp.asc | gpg --dearmor > warpdotdev.gpg
sudo install -D -o root -g root -m 644 warpdotdev.gpg /etc/apt/keyrings/warpdotdev.gpg
rm -f warpdotdev.gpg
The temporary key file is deleted after it has been installed into the system keyring.
Step 5: Add the Warp Repository
Now add Warp Terminal’s official APT repository to your system.
Run:
sudo sh -c 'echo "deb [arch=amd64 signed-by=/etc/apt/keyrings/warpdotdev.gpg] https://releases.warp.dev/linux/deb stable main" > /etc/apt/sources.list.d/warpdotdev.list'This creates a new repository configuration file that allows APT to download Warp Terminal directly from Warp’s official package repository.
Step 6: Update the Package List Again
After adding a new repository, update the package list once more so APT can retrieve information about the packages available from the Warp repository.
Run:
sudo apt updateAPT should now detect the newly added Warp repository.
Step 7: Install Warp Terminal
With the repository configured, you can now install Warp Terminal.
Run:
sudo apt install warp-terminalAPT will download and install Warp Terminal along with any required dependencies.
The installation may take a few minutes depending on your Internet connection.
Step 8: Reload the Menu
Note: Starting with FunOS 24.04.4 LTS (Build 20260618) and FunOS 26.04 LTS (Build 20260618), the menu updates automatically, so you can skip this step.
After the installation is complete, FunOS needs to reload the application menu so the new launcher becomes visible.
To do this:
- Click the Menu button in the lower-left corner of the screen.
- Click Reload menu.
Once the menu has been reloaded, Warp Terminal will appear in the application menu.
Launching Warp Terminal
To start Warp Terminal:
- Click the Menu button in the lower-left corner.
- Open the System section.
- Click Warp.
The first launch may take a few moments while Warp Terminal performs its initial setup.
How to Uninstall Warp Terminal on FunOS
If you no longer need Warp Terminal, you can completely remove it from your system by following the steps below.
Step 1: Open a Terminal
Open the Terminal using one of the following methods:
- Click Menu → Terminal.
- Click the Terminal icon in the Tray.
- Press Ctrl + Alt + T.
Step 2: Remove Warp Terminal
Remove the Warp Terminal package by running:
sudo apt remove --purge warp-terminalThe --purge option removes both the package and its system-wide configuration files.
Step 3: Remove Any Unused Dependencies
After uninstalling Warp Terminal, you can remove packages that were installed automatically but are no longer required.
Run:
sudo apt autoremove --purgeThis helps keep your system clean by removing unnecessary packages.
Step 4: Remove the Repository and GPG Key (Optional)
If you do not plan to reinstall Warp Terminal in the future, you can remove the repository configuration and its GPG key.
Run:
sudo rm -f /etc/apt/sources.list.d/warpdotdev.list
sudo rm -f /etc/apt/keyrings/warpdotdev.gpg
These commands remove the Warp repository from your system.
Step 5: Update the Package List
After removing the repository, update the package list so APT no longer references it.
Run:
sudo apt updateStep 6: Remove User Data (Optional)
Warp Terminal stores user-specific data in your home directory. If you want to completely remove all personal settings and application data, run:
rm -rf ~/.local/share/warp-terminal
rm -rf ~/.local/state/warp-terminal
These commands are optional. Skip them if you want to preserve your Warp Terminal settings for a future reinstall.
Step 7: Reload the Menu
Note: Starting with FunOS 24.04.4 LTS (Build 20260618) and FunOS 26.04 LTS (Build 20260618), the menu updates automatically, so you can skip this step.
Finally, reload the FunOS application menu.
- Click the Menu button in the lower-left corner of the screen.
- Click Reload menu.
The Warp Terminal launcher will disappear from the application menu.
Conclusion
Warp Terminal brings a modern and feature-rich command-line experience to FunOS. With its editor-like interface, block-based command output, intelligent command editing, and built-in AI capabilities, it offers a more productive alternative to traditional terminal emulators.
By following this guide, you have learned how to install Warp Terminal from its official repository, launch it from the FunOS application menu, and completely remove it if necessary. Because the official repository remains configured after installation, you will also receive future Warp Terminal updates through the normal system update process, making it easy to keep the application up to date.