GNOME Disks, also known as Disk Utility, is a powerful graphical tool for managing storage devices in Linux. Whether you’re formatting USB drives, creating disk images, or inspecting SMART data from your hard drive, GNOME Disks provides a simple interface for complex tasks. In this article, you’ll learn how to install and uninstall GNOME Disks on FunOS step by step.
What is GNOME Disks?
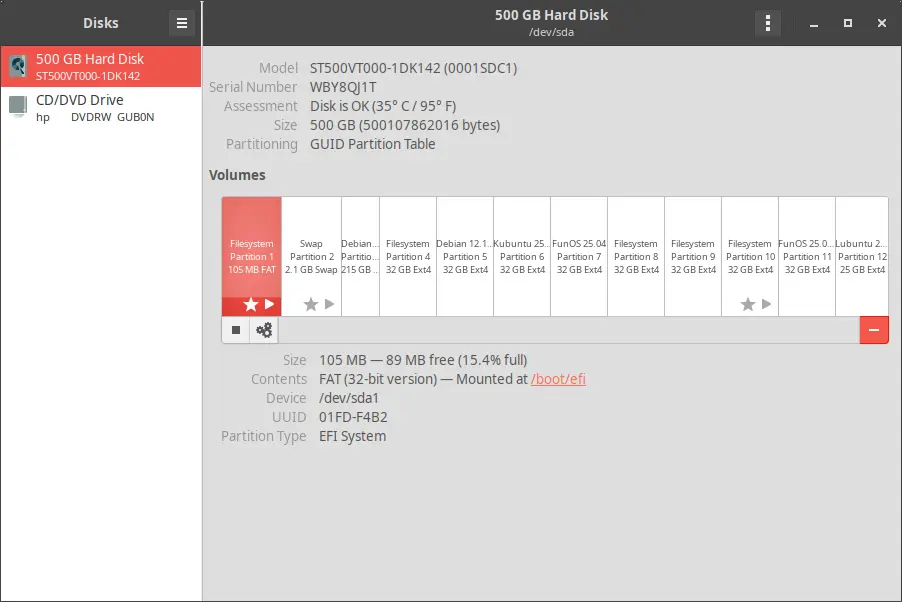
GNOME Disks is a graphical application used for managing disks and partitions in Linux systems. It allows users to:
- View detailed information about disks and partitions.
- Format, create, and delete partitions.
- Mount and unmount drives.
- Manage disk images (*.iso, .img files).
- Monitor disk health using SMART data.
It’s a user-friendly alternative to command-line disk tools and is especially helpful for users who prefer graphical interfaces when performing disk-related operations.
How to Install GNOME Disks on FunOS
Work on: 22.04.5 ✅ | 24.04.4 ✅ | 25.10 ✅ | 26.04 ✅
Step 1: Open a Terminal
You can open a Terminal window in any of the following ways:
- Click Menu in the lower-left corner, then select Terminal.
- Click the Terminal icon in the Tray.
- Press Ctrl + Alt + T on your keyboard.
Step 2: Update the Package List
Before installing new software, it’s always a good idea to update the package list to make sure you’re installing the latest version. Run the following command:
sudo apt updateStep 3: Install GNOME Disks
Now install GNOME Disks by running:
sudo apt install gnome-disk-utilityThis will download and install the application and its dependencies.
Step 4: Reload the Menu
Note: Starting with FunOS 24.04.4 LTS (Build 20260618) and FunOS 26.04 LTS (Build 20260618), the menu updates automatically, so you can skip this step.
After installation, you may not immediately see the new application in the Menu. To make it appear:
- Click the Menu button in the lower-left corner.
- Click Reload menu.
This action updates the JWM menu so that newly installed applications are listed properly.
Launching GNOME Disks
Once installed and the menu has been reloaded, you can find GNOME Disks by:
- Clicking the Menu button in the lower-left corner.
- Navigating to the Accessories or Settings category.
- Clicking on Disks.
This will open the graphical interface where you can begin managing your storage devices.
How to Uninstall GNOME Disks on FunOS
If you no longer need GNOME Disks, you can remove it completely by following these steps:
Step 1: Open a Terminal
Open a Terminal using one of the methods described earlier.
Step 2: Remove GNOME Disks
Run the following command to uninstall the application:
sudo apt remove --purge gnome-disk-utilityThe --purge option ensures that configuration files are also removed.
Step 3: Remove Any Unused Dependencies
After uninstalling, you can clean up any packages that are no longer needed:
sudo apt autoremove --purgeStep 4: Reload the Menu
Note: Starting with FunOS 24.04.4 LTS (Build 20260618) and FunOS 26.04 LTS (Build 20260618), the menu updates automatically, so you can skip this step.
To remove the GNOME Disks entry from the Menu:
- Click the Menu button in the lower-left corner.
- Click Reload menu.
Conclusion
GNOME Disks is a handy utility for managing your storage devices graphically in FunOS. Whether you’re formatting a USB stick, checking your hard drive’s health, or partitioning your disk, this tool provides the essential functions in an intuitive interface. Now that you’ve learned how to install and uninstall it on FunOS, you’re ready to take full control of your system’s storage.