
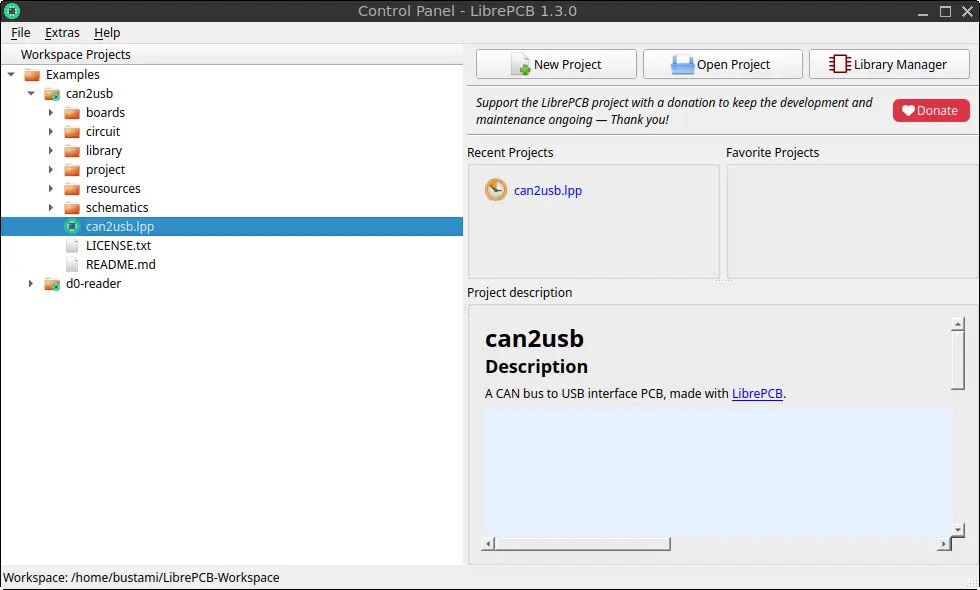
LibrePCB is a powerful open-source Electronic Design Automation (EDA) application used for designing electronic schematics and printed circuit boards (PCBs). It provides an intuitive interface for creating circuit diagrams, managing component libraries, and designing PCB layouts for electronics projects. LibrePCB is suitable for hobbyists, students, makers, and professional engineers who need a modern and easy-to-use PCB design tool on Linux.
On FunOS, there are two main ways to install LibrePCB. The first method uses the Ubuntu repositories, which is the easiest and most integrated option. The second method uses the official portable .tar.gz package provided by the LibrePCB developers. This method is useful if you want a newer version than the one available in the Ubuntu repositories.
This tutorial explains both installation methods in detail, including how to launch LibrePCB and how to completely remove it from FunOS if needed.
What is LibrePCB?
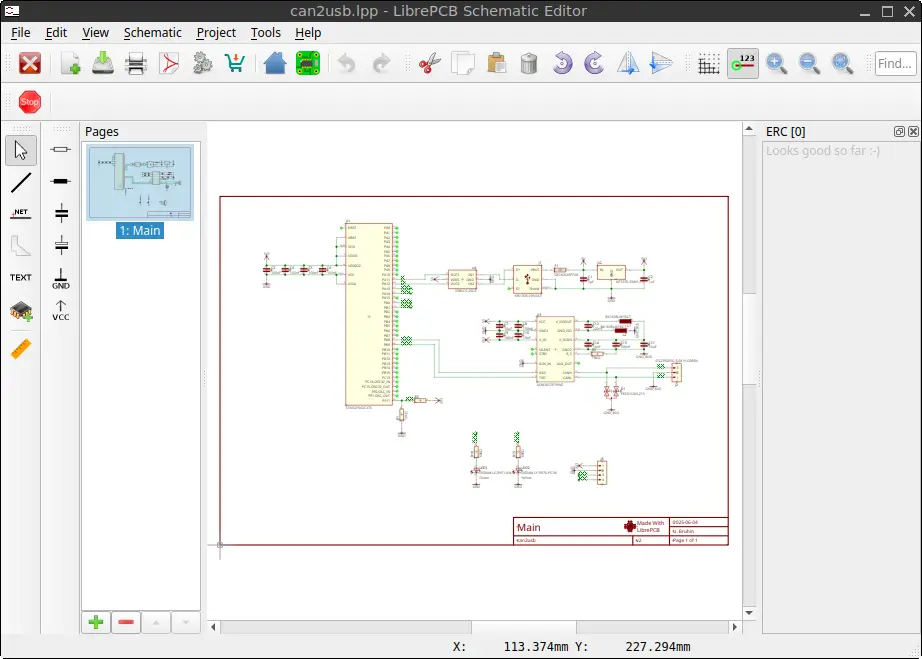
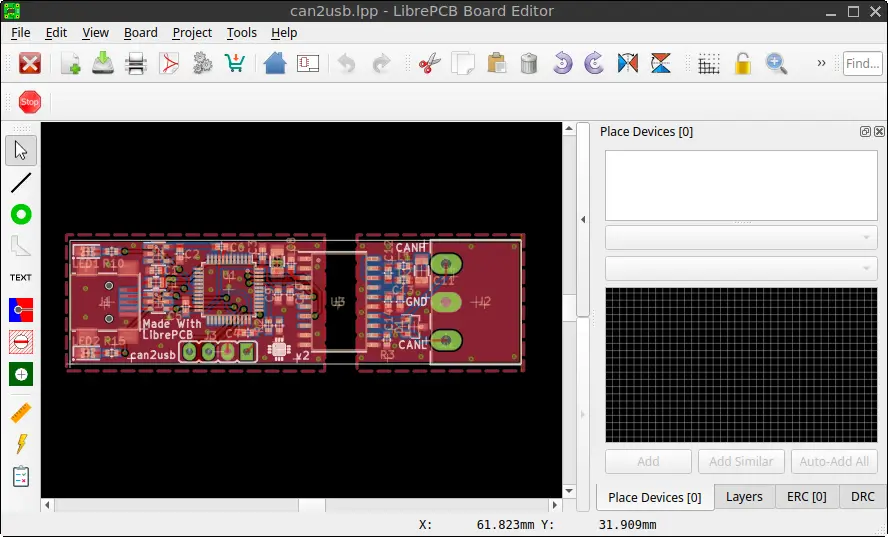
LibrePCB is a free and open-source PCB design software application designed to simplify electronics development workflows. It allows users to create schematics, manage electronic components, and design professional PCB layouts in a modern and organized environment.
Some features of LibrePCB include:
- Schematic editor
- PCB layout editor
- 3D board visualization
- Library management system
- Cross-platform support
- Modern and clean user interface
- Open-source licensing
LibrePCB is especially popular among Linux users because it is lightweight, actively developed, and easy to use compared to some traditional EDA software.
How to Install LibrePCB on FunOS
There are two installation methods available:
- Installing from the Ubuntu repositories
- Installing using the official
.tar.gzportable package
Method 1: Installing from the Ubuntu Repositories
Work on: 22.04.5 ❌ | 24.04.5 ❌ | 25.10 ✅ | 26.04.1 ✅
This is the easiest installation method and is recommended for most users.
Step 1: Open a Terminal
You can open a Terminal in FunOS using one of these methods:
- Click Menu in the lower-left corner of the screen, then click Terminal
- Click the Terminal icon in the Tray
- Press Ctrl + Alt + T
Step 2: Update the Package List
Before installing LibrePCB, update the package list first.
sudo apt updateThis command refreshes the package information from the Ubuntu repositories configured on your FunOS system.
Step 3: Install LibrePCB
Install LibrePCB using the following command:
sudo apt install librepcbDuring the installation process, FunOS will automatically download and install LibrePCB along with any required dependencies.
Step 4: Reload the Menu
Note: Starting with FunOS 24.04.4 LTS (Build 20260618) and FunOS 26.04 LTS (Build 20260618), the menu updates automatically, so you can skip this step.
In FunOS, newly installed applications do not immediately appear in the menu until the menu cache is refreshed.
To reload the menu:
- Click the Menu button in the lower-left corner of the screen
- Click Reload menu
Method 2: Installing LibrePCB Using the .tar.gz Package
Work on: 22.04.5 ✅ | 24.04.5 ✅ | 25.10 ✅ | 26.04.1 ✅
This method installs the official portable archive provided by the LibrePCB developers. It is useful if you want a newer version of LibrePCB than the version available in the Ubuntu repositories.
Step 1: Download the LibrePCB tarball (.tar.gz) File
1. Visit the LibrePCB official download page: https://librepcb.org/download/
2. Click on the text that says “Portable Archive”
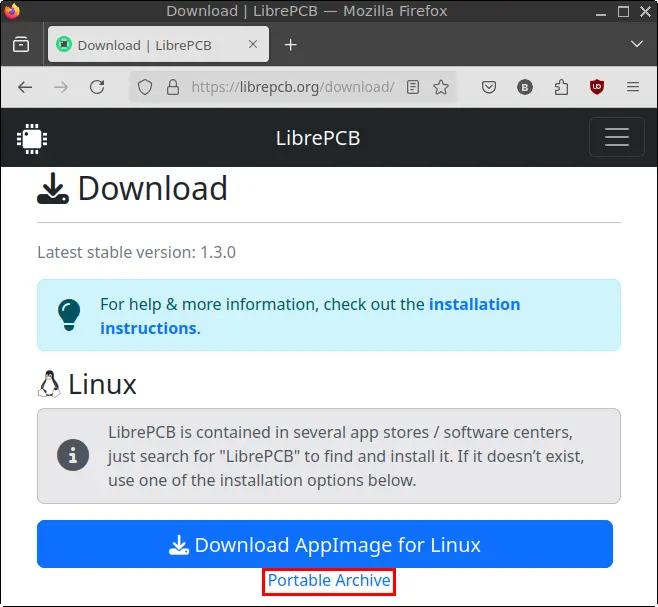
3. Save the .tar.gz file to your Downloads directory
Step 2: Open a Terminal
Open a Terminal using one of the available methods in FunOS.
Step 3: Navigate to the Downloads Directory
Move to the Downloads directory where the LibrePCB archive was saved.
cd ~/DownloadsStep 4: Extract the .tar.gz File
Extract the downloaded archive and move it into a hidden directory in your home folder.
tar -xvzf librepcb-*.tar.gz -C ~/
mv ~/librepcb-* ~/.librepcb
Explanation:
tar -xvzfextracts the compressed archive-C ~/extracts the files into your home directorymvrenames the extracted directory to~/.librepcb
Using a hidden directory helps keep your home directory organized.
Step 5: Navigate to the Home Directory
Move back to your home directory.
cdStep 6: Create a Symbolic Link to the LibrePCB Executable
Create symbolic links so LibrePCB can be launched easily from the Terminal.
sudo ln -sf ~/.librepcb/bin/librepcb /usr/bin/librepcb
sudo ln -sf ~/.librepcb/bin/librepcb-cli /usr/bin/librepcb-cli
Explanation:
ln -sfcreates symbolic links to the LibrePCB executables
Step 7: Create a Desktop Entry for LibrePCB
Create a desktop entry so LibrePCB appears in the FunOS application menu.
mkdir -p ~/.local/share/applications
cp ~/.librepcb/share/applications/org.librepcb.LibrePCB.desktop ~/.local/share/applications/org.librepcb.LibrePCB.desktop
Explanation:
- The
.desktopfile integrates LibrePCB into the desktop environment
Step 8: Copy the LibrePCB Icon Theme to the Local Icons Directory
Copy the LibrePCB icon files into the local icon directory.
mkdir -p ~/.local/share/icons
cp -r ~/.librepcb/share/icons/hicolor ~/.local/share/icons
This step ensures that LibrePCB icons appear correctly in the menu and file manager.
Step 9: Register LibrePCB MIME Types in the System
Register LibrePCB file associations and MIME types.
mkdir -p ~/.local/share/mime/packages
cp ~/.librepcb/share/mime/packages/org.librepcb.LibrePCB.xml ~/.local/share/mime/packages/org.librepcb.LibrePCB.xml
update-mime-database ~/.local/share/mime
This allows FunOS to recognize LibrePCB project files correctly.
Step 10: Remove the Downloaded .tar.gz File
After installation, you can remove the downloaded archive file.
rm -f ~/Downloads/librepcb-*.tar.gzThis step is optional but helps keep the Downloads directory clean.
Step 11: Reload the Menu
Note: Starting with FunOS 24.04.4 LTS (Build 20260618) and FunOS 26.04 LTS (Build 20260618), the menu updates automatically, so you can skip this step.
Reload the application menu so LibrePCB appears correctly.
- Click the Menu button in the lower-left corner
- Click Reload menu
Launching LibrePCB
After installation, you can launch LibrePCB from the FunOS application menu.
To launch it:
- Click the Menu button in the lower-left corner
- Open the Development category
- Click LibrePCB
LibrePCB may take a few moments to start during the first launch while it initializes configuration files and libraries.
How to Uninstall LibrePCB on FunOS
The removal steps depend on which installation method you used.
Uninstall LibrePCB Installed from the Ubuntu Repositories
Step 1: Open a Terminal
Open a Terminal in FunOS.
Step 2: Remove LibrePCB
Run the following command to remove LibrePCB from the system.
sudo apt remove --purge librepcbThe --purge option removes both the package and its system-wide configuration files.
Step 3: Remove Any Unused Dependencies
Remove unused packages that were automatically installed during the LibrePCB installation process.
sudo apt autoremove --purgeThis helps free disk space and keeps the system clean.
Step 4: Remove User Data (Optional)
If you also want to remove personal settings and project workspace data, run:
rm -rf ~/.cache/LibrePCB
rm -rf ~/.config/LibrePCB
rm -rf ~/.local/share/librepcb
rm -rf ~/LibrePCB-Workspace
Warning:
This step permanently deletes LibrePCB configuration files and workspace data stored in your home directory.
Step 5: Reload the Menu
Note: Starting with FunOS 24.04.4 LTS (Build 20260618) and FunOS 26.04 LTS (Build 20260618), the menu updates automatically, so you can skip this step.
Reload the menu to remove LibrePCB from the application list.
- Click the Menu button in the lower-left corner of the screen
- Click Reload menu
Uninstall LibrePCB Installed from the .tar.gz Package
Step 1: Open a Terminal
Open a Terminal in FunOS.
Step 2: Remove the LibrePCB Directory
Remove the LibrePCB installation directory.
rm -rf ~/.librepcbStep 3: Remove the Symbolic Link
Remove the symbolic links created during installation.
sudo rm -f /usr/bin/librepcb
sudo rm -f /usr/bin/librepcb-cli
Step 4: Remove the Desktop Entry
Remove the LibrePCB menu launcher.
rm -f ~/.local/share/applications/org.librepcb.LibrePCB.desktopStep 5: Remove the LibrePCB Icon Theme
Remove the LibrePCB icon files.
rm -f ~/.local/share/icons/hicolor/128x128/apps/org.librepcb.LibrePCB.png
rm -f ~/.local/share/icons/hicolor/16x16/apps/org.librepcb.LibrePCB.png
rm -f ~/.local/share/icons/hicolor/24x24/apps/org.librepcb.LibrePCB.png
rm -f ~/.local/share/icons/hicolor/32x32/apps/org.librepcb.LibrePCB.png
rm -f ~/.local/share/icons/hicolor/48x48/apps/org.librepcb.LibrePCB.png
rm -f ~/.local/share/icons/hicolor/64x64/apps/org.librepcb.LibrePCB.png
rm -f ~/.local/share/icons/hicolor/scalable/apps/org.librepcb.LibrePCB.svg
rm -f ~/.local/share/icons/hicolor/scalable/mimetypes/org.librepcb.LibrePCB-archive.svg
rm -f ~/.local/share/icons/hicolor/scalable/mimetypes/org.librepcb.LibrePCB-file.svg
rm -f ~/.local/share/icons/hicolor/scalable/mimetypes/org.librepcb.LibrePCB-project.svg
Step 6: Unregister LibrePCB MIME Types from the System
Remove the LibrePCB MIME type registration.
rm -f ~/.local/share/mime/packages/org.librepcb.LibrePCB.xml
update-mime-database ~/.local/share/mime
Step 7: Remove User Data (Optional)
Remove LibrePCB user configuration and workspace files.
rm -rf ~/.cache/LibrePCB
rm -rf ~/.config/LibrePCB
rm -rf ~/.local/share/librepcb
rm -rf ~/LibrePCB-Workspace
Warning:
This command permanently deletes all LibrePCB user settings and project workspace data stored in your home directory.
Step 8: Reload the Menu
Note: Starting with FunOS 24.04.4 LTS (Build 20260618) and FunOS 26.04 LTS (Build 20260618), the menu updates automatically, so you can skip this step.
Reload the menu to fully remove LibrePCB from the application list.
- Click the Menu button in the lower-left corner
- Click Reload menu
Conclusion
LibrePCB is an excellent open-source PCB design application for Linux users who need a modern and lightweight electronics design environment. On FunOS, you can install LibrePCB easily using either the Ubuntu repositories or the official portable .tar.gz package.
The Ubuntu repository method is simpler and easier to maintain through system updates, while the portable archive method provides access to newer versions directly from the LibrePCB developers.
Whichever method you choose, LibrePCB integrates well with FunOS and provides a powerful platform for creating schematics, PCB layouts, and electronics projects.