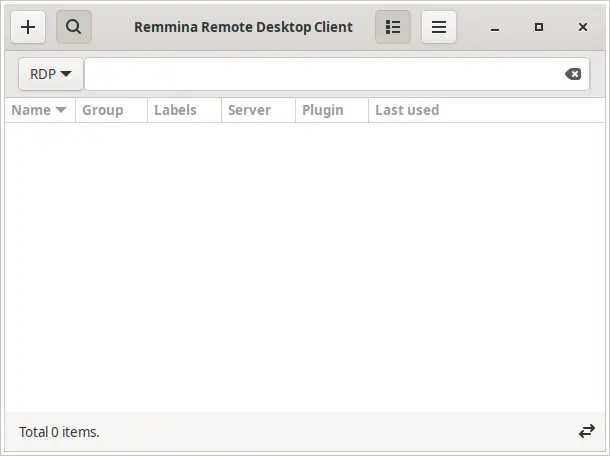
What is Remmina?
Remmina is a powerful and versatile remote desktop client designed for Linux and Unix-based systems. It allows users to access and control remote computers using various remote desktop protocols. The key protocols supported by Remmina include:
- RDP (Remote Desktop Protocol): Used to connect to Windows machines.
- VNC (Virtual Network Computing): For accessing other Unix-based systems.
- SSH (Secure Shell): Provides a secure way to access remote servers.
- SPICE (Simple Protocol for Independent Computing Environments): Often used with virtual machines.
- NX: A remote access protocol for fast and efficient connections.
Remmina is highly configurable and provides features such as:
- Tabbed interface: Allows multiple remote connections in a single window.
- Profile management: Save and manage connection profiles for easy access.
- Encryption: Secure remote sessions with encryption.
- Plugins: Extend functionality through various plugins.
It’s widely used in environments where multiple systems need to be accessed remotely, offering a versatile and user-friendly interface for system administrators and other users who need remote access capabilities.

How to Install Remmina on FunOS
There are several methods to install Remmina on FunOS. Here, we outline the steps for each method.
Method 1: Installing from the Ubuntu Repositories
1. Open a Terminal
2. Update the package list:
sudo apt update3. Install Remmina:
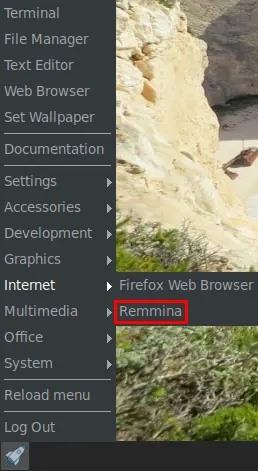
sudo apt install remmina4. Click the menu in the bottom left corner of the screen. Next, click the Reload menu. The objective is to display Remmina in the menu.

Method 2: Installing from the Remmina PPA Team (recommended)
This PPA is maintained by Remmina PPA Team.
1. Open a Terminal
2. Add the Remmina PPA Team:
sudo add-apt-repository ppa:remmina-ppa-team/remmina-next3. Update the package list:
sudo apt update4. Install Remmina:
sudo apt install remmina5. Click the menu in the bottom left corner of the screen. Next, click the Reload menu. The objective is to display Remmina in the menu.

Launching Remmina
After installation, you can start Remmina by typing remmina-file-wrapper in the terminal or by finding it in your application menu.

How to Uninstall Remmina on FunOS
If you no longer need Remmina, you can uninstall it using the following methods:
Uninstall Remmina Installed from the Ubuntu Repositories
1. Open a Terminal
2. Remove Remmina:
sudo apt remove --purge remmina3. Remove any unused dependencies:
sudo apt autoremove --purge4. Remove user data (optional):
rm -rf $HOME/.config/remmina
rm -rf $HOME/.cache/remmina
rm -rf $HOME/.local/share/remmina
5. Click the menu in the bottom left corner of the screen. Next, click the Reload menu. The objective is to remove Remmina from the menu.

Uninstall Remmina Installed from the Remmina PPA Team
1. Open a Terminal
2. Remove Remmina:
sudo apt remove --purge remmina3. Remove any unused dependencies:
sudo apt autoremove --purge4. Remove the PPA if you no longer need it:
sudo add-apt-repository --remove ppa:remmina-ppa-team/remmina-next5. Update the package list:
sudo apt update6. Remove user data (optional):
rm -rf $HOME/.config/remmina
rm -rf $HOME/.cache/remmina
rm -rf $HOME/.local/share/remmina
7. Click the menu in the bottom left corner of the screen. Next, click the Reload menu. The objective is to remove Remmina from the menu.

Conclusion
Remmina is an essential tool for anyone who needs to manage multiple remote connections efficiently. Whether you are a system administrator or a user needing remote access capabilities, Remmina offers a versatile and user-friendly interface. Installation, launching, and uninstallation of Remmina on FunOS are straightforward processes that can be accomplished using various methods, ensuring you can easily integrate it into your workflow.

Leave a Reply