VirtualBox is one of the most popular virtualization applications available on Linux. With VirtualBox, you can run multiple operating systems—such as Windows or other Linux distributions—inside FunOS without replacing your current system.
This guide explains how to install VirtualBox on FunOS, using two supported methods: installing directly from the Ubuntu repositories or installing using the official .deb package from the VirtualBox website.
What is VirtualBox?
VirtualBox is a free and open-source virtualization software developed by Oracle. It allows you to create and run virtual machines (VMs), which are complete operating systems running inside a window on your desktop.
With VirtualBox, you can:
- Test other Linux distributions without affecting your FunOS installation
- Run Windows applications on FunOS
- Experiment with software in a safe, isolated environment
- Learn operating systems and server setups using virtual machines
VirtualBox runs efficiently on FunOS because FunOS is based on Ubuntu and fully supports the required kernel modules and dependencies.
How to Install VirtualBox on FunOS
There are two recommended ways to install VirtualBox on FunOS:
- Method 1: Install from the Ubuntu repositories (simpler and fully integrated)
- Method 2: Install using the official
.debpackage (newer versions from Oracle)
Choose the method that best suits your needs.
Method 1: Installing from the Ubuntu Repositories
Work on: 22.04.5 ✅ | 24.04.3 ✅ | 25.04 ✅ | 25.10 ✅ | 26.04 ✅
This method installs VirtualBox directly from the Ubuntu repositories used by FunOS. It is the easiest and most stable option for most users.
Step 1: Open a Terminal
First, open a Terminal on FunOS. You can do this in one of the following ways:
- Click Menu in the lower-left corner of the screen, then click Terminal
- Click the Terminal icon in the Tray
- Press Ctrl + Alt + T on your keyboard
Step 2: Update the Package List
Before installing new software, it is recommended to update the package list so FunOS knows about the latest available versions.
sudo apt updateEnter your password when prompted.
Step 3: Install VirtualBox
Now install VirtualBox from the Ubuntu repositories.
sudo apt install virtualboxFunOS will download and install VirtualBox along with all required dependencies.
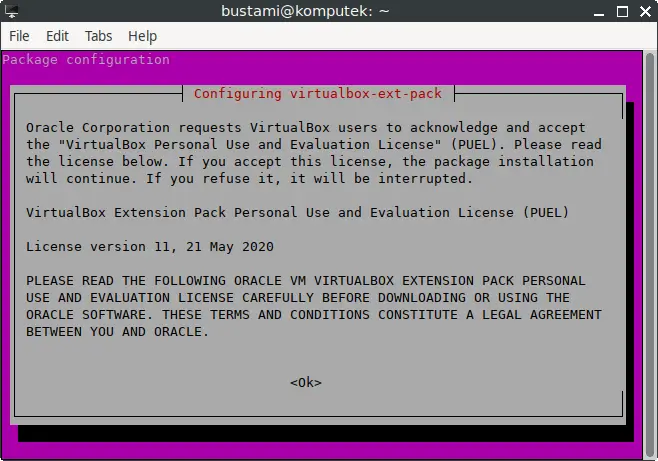
Step 4: Install VirtualBox Extension Pack
The VirtualBox Extension Pack adds important features such as USB 2.0/3.0 support, RDP, and disk encryption.
sudo apt install virtualbox-ext-packDuring installation, you will see the VirtualBox Extension Pack Personal Use and Evaluation License (PUEL).
- Read the license text
- Select <Ok> and press Enter to continue
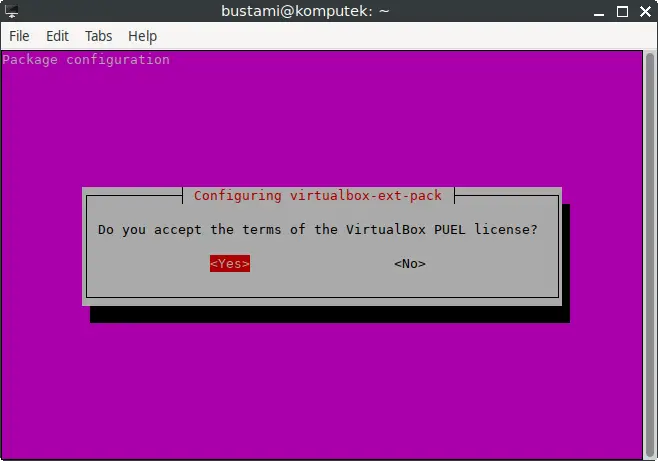
Next, accept the license terms:
- Select <Yes> and press Enter
Step 5: Add User to the vboxusers Group
To allow your user account to access USB devices and other VirtualBox features, you must add your user to the vboxusers group.
sudo usermod -aG vboxusers $USER
newgrp vboxusers
The newgrp command applies the group change immediately without logging out.
Step 6: Reload the Menu
After installation, reload the FunOS menu so VirtualBox appears correctly.
- Click the Menu button in the lower-left corner
- Click Reload menu
Method 2: Installing VirtualBox Using the .deb Package
Work on: 22.04.5 ✅ | 24.04.3 ✅ | 25.04 ✅ | 25.10 ❌ | 26.04 ❌
This method installs VirtualBox using the official .deb package provided by Oracle. It is useful if you want a newer version than what is available in the Ubuntu repositories.
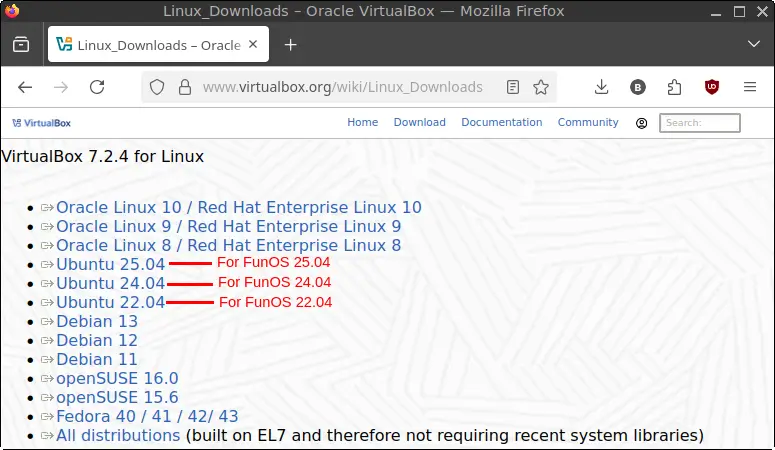
Step 1: Download the VirtualBox .deb File
- Visit the VirtualBox for Linux download page:
https://www.virtualbox.org/wiki/Linux_Downloads - Download the
.debfile that matches your FunOS version:- FunOS 22.04 → select Ubuntu 22.04
- FunOS 24.04 → select Ubuntu 24.04
- FunOS 25.04 → select Ubuntu 25.04
- Save the file in your Downloads directory.
Step 2: Download the VirtualBox Extension Pack File
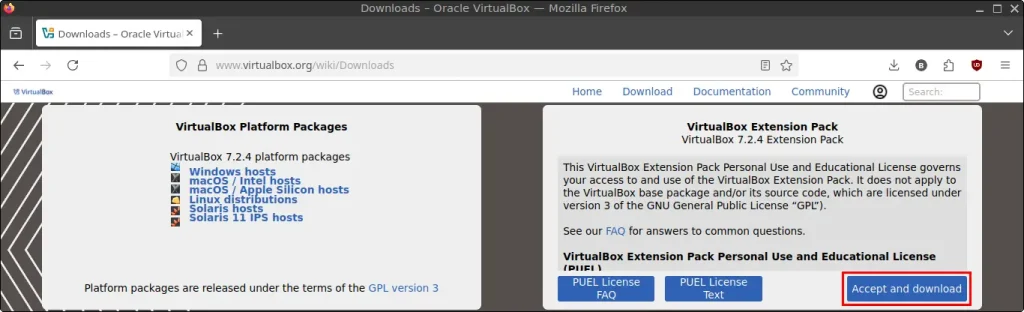
- Visit the VirtualBox download page:
https://www.virtualbox.org/wiki/Downloads - In the VirtualBox Extension Pack section, click Accept and download
- Save the file in your Downloads directory
Step 3: Open a Terminal
Open a Terminal using one of the following methods:
- Click Menu in the lower-left corner, then click Terminal
- Click the Terminal icon in the Tray
- Press Ctrl + Alt + T
Step 4: Update the Package List
Update the package list before installing dependencies.
sudo apt updateStep 5: Install the Necessary Dependencies
These packages are required to build and load VirtualBox kernel modules.
sudo apt install apt-transport-https curl build-essential dkmsStep 6: Navigate to the Downloads Directory
Change to the directory where the downloaded files are stored.
cd ~/DownloadsStep 7: Install VirtualBox
Install the downloaded .deb package.
sudo apt install ./virtualbox-*.debFunOS will resolve and install any missing dependencies automatically.
Step 8: Install VirtualBox Extension Pack
Install the Extension Pack using VBoxManage.
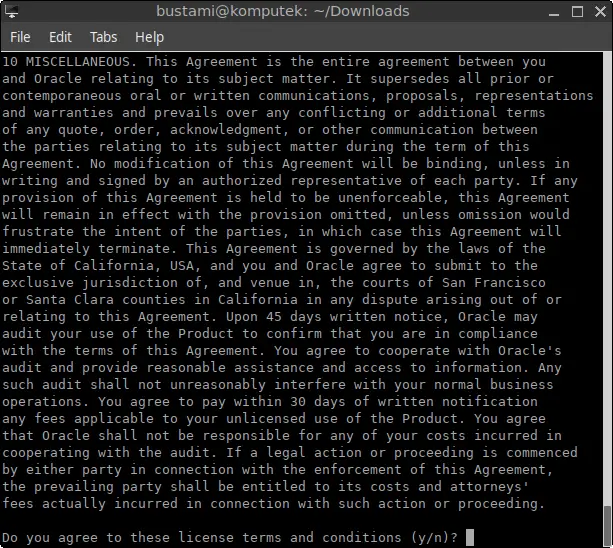
sudo VBoxManage extpack install Oracle_VirtualBox_Extension_Pack-*.vbox-extpackYou will be shown the VirtualBox Extension Pack Personal Use and Educational License (PUEL).
Type y and press Enter to accept the license terms.
Step 9: Remove the Downloaded .deb and .vbox-extpack Files
After installation, you can safely remove the downloaded files.
rm -f virtualbox-*.deb Oracle_VirtualBox_Extension_Pack-*.vbox-extpackStep 10: Add User to the vboxusers Group
Add your user account to the vboxusers group.
sudo usermod -aG vboxusers $USER
newgrp vboxusers
Step 11: Add the GPG Key
Add the official Oracle GPG key so FunOS can verify future VirtualBox updates.
curl -fSsL https://www.virtualbox.org/download/oracle_vbox_2016.asc | gpg --dearmor | sudo tee /usr/share/keyrings/oracle-virtualbox-2016.gpg > /dev/nullStep 12: Add the Repository
Add the VirtualBox repository to your system.
echo "deb [arch=amd64 signed-by=/usr/share/keyrings/oracle-virtualbox-2016.gpg] https://download.virtualbox.org/virtualbox/debian $(lsb_release -cs) contrib" | sudo tee -a /etc/apt/sources.list.d/virtualbox.listStep 13: Update the Package List Again
Update the package list to include the new repository.
sudo apt updateStep 14: Reload the Menu
Finally, reload the FunOS menu so VirtualBox appears correctly.
- Click Menu in the lower-left corner
- Click Reload menu
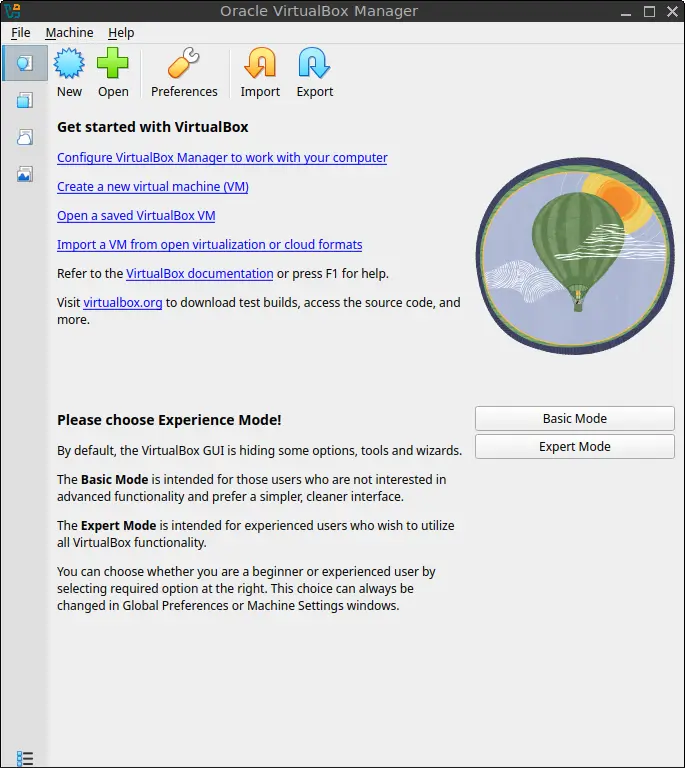
Launching VirtualBox
After installing VirtualBox and reloading the menu, you can launch it from the FunOS menu.
- Click the Menu button in the lower-left corner of the screen
- Look in the System category
- Click VirtualBox
VirtualBox will open in a new window. From here, you can start creating and managing virtual machines.
How to Uninstall VirtualBox on FunOS
If you no longer need VirtualBox, you can safely remove it from FunOS. The uninstallation steps depend on how VirtualBox was originally installed.
Choose the appropriate method below.
Uninstall VirtualBox Installed from the Ubuntu Repositories
Follow these steps if you installed VirtualBox using the Ubuntu repositories.
Step 1: Open a Terminal
Open a Terminal using one of the following methods:
- Click Menu in the lower-left corner of the screen, then click Terminal
- Click the Terminal icon in the Tray
- Press Ctrl + Alt + T
Step 2: Remove VirtualBox
Remove VirtualBox and its configuration files from the system.
sudo apt remove --purge virtualboxThis command completely removes the VirtualBox package installed from the repositories.
Step 3: Remove Any Unused Dependencies
Clean up packages that were installed as dependencies but are no longer needed.
sudo apt autoremove --purgeStep 4: Remove User Data (Optional)
If you want to remove all VirtualBox user settings and virtual machine configurations stored in your home directory, run:
rm -rf $HOME/.config/VirtualBox⚠️ This step is optional. Skipping it will preserve your VirtualBox settings and virtual machines.
Step 5: Reload the Menu
Reload the FunOS menu so the VirtualBox entry is removed.
- Click the Menu button in the lower-left corner
- Click Reload menu
Uninstall VirtualBox Installed from the .deb Package
Follow these steps if you installed VirtualBox using the official .deb package from the VirtualBox website.
Step 1: Open a Terminal
Open a Terminal using one of the following methods:
- Click Menu in the lower-left corner of the screen, then click Terminal
- Click the Terminal icon in the Tray
- Press Ctrl + Alt + T
Step 2: Remove VirtualBox
Remove all VirtualBox packages installed from the .deb files.
sudo apt remove --purge virtualbox-*This ensures all VirtualBox-related packages are removed.
Step 3: Remove build-essential and dkms (Optional)
If you installed these packages specifically for VirtualBox, you can remove them.
sudo apt remove --purge build-essential dkms⚠️ Skip this step if you use these packages for other software development or kernel modules.
Step 4: Remove Any Unused Dependencies
Clean up remaining unused packages.
sudo apt autoremove --purgeStep 5: Remove the Repository and Key (Optional)
If you added the VirtualBox repository manually, remove it along with its GPG key.
sudo rm -f /etc/apt/sources.list.d/virtualbox.list
sudo rm -f /usr/share/keyrings/oracle-virtualbox-2016.gpg
Step 6: Update the Package List
Update the package list after removing the repository.
sudo apt updateStep 7: Remove User Data (Optional)
Remove VirtualBox user configuration files from your home directory.
rm -rf $HOME/.config/VirtualBox⚠️ This step permanently deletes VirtualBox settings and virtual machines stored in your home directory.
Step 8: Reload the Menu
Reload the FunOS menu to remove any remaining VirtualBox menu entries.
- Click the Menu button in the lower-left corner
- Click Reload menu
Conclusion
VirtualBox is a powerful virtualization solution that allows FunOS users to run multiple operating systems safely and efficiently on a single machine. Whether you choose to install it from the Ubuntu repositories for simplicity or use the official .deb package for newer versions, FunOS provides full compatibility and smooth integration.
With proper installation, menu reloading, and group configuration, VirtualBox works reliably on FunOS. When it is no longer needed, it can also be completely removed using the uninstallation steps provided, ensuring your system remains clean and lightweight—true to the FunOS philosophy.
Leave a Reply