Changing the LightDM background in FunOS is a simple process that can help you personalize your login screen. Follow the steps below to update the background image to one of your choice.
Step 1: Open Terminal
To begin, open the Terminal application in FunOS using one of the following methods:
- Click Menu in the bottom-left corner and select Terminal.
- Click the Terminal icon in the Tray.
- Use the shortcut Ctrl + Alt + T.
Step 2: Add LightDM to Your User Group
To ensure you have the necessary permissions to change the LightDM background, add the LightDM user to your user group. Enter the following command in the terminal:
sudo adduser lightdm $USERYou will need to enter your password to execute this command. Once completed, this step ensures that lightdm has the required access rights.
Step 3: Open LightDM GTK Greeter Settings
Next, navigate to the LightDM GTK Greeter settings via the menu. Follow these steps:
- Click Menu in the bottom-left corner
- Select Settings
- Click LightDM GTK Greeter settings
This will open the LightDM GTK Greeter settings window.
Step 4: Authenticate with Your Account Password
Upon opening the LightDM GTK Greeter settings, you will be prompted to enter your account password to make changes. Enter your password and proceed.
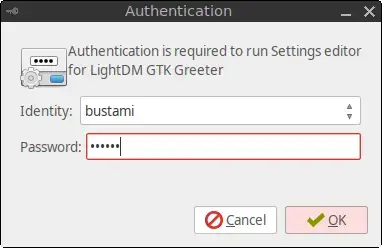
Step 5: Select a New Background Image
Once authenticated, follow these steps to select a new background image:
1. In the LightDM GTK Greeter settings window, locate the Image option.
2. Click the folder icon to the right of the Image option.
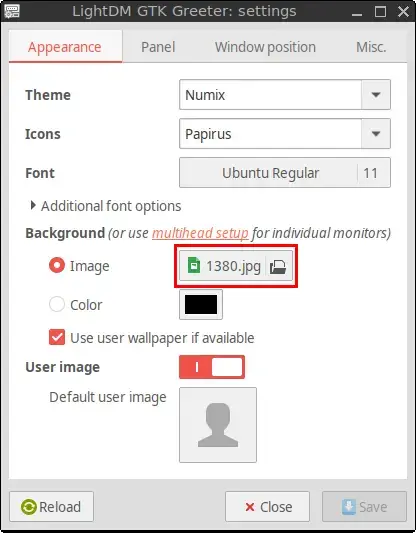
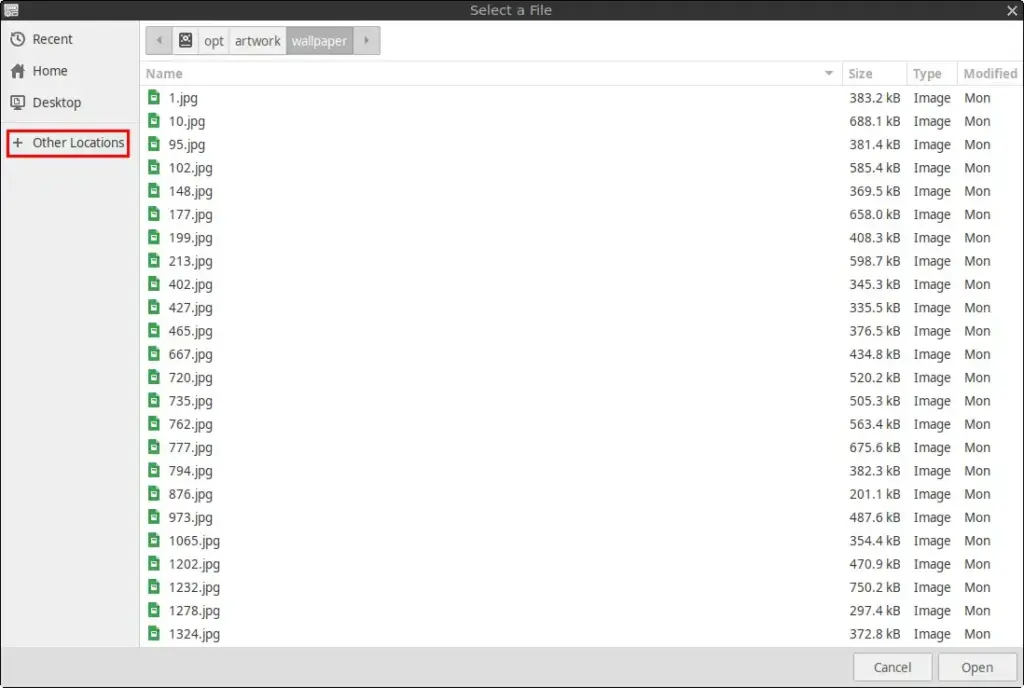
Image optionBy default, the /opt/artwork/wallpaper folder will open. Here you can select from the default images available in FunOS.
If you prefer to use a custom image stored in your home directory, follow these additional steps:
1. Click Other Locations
2. Click Computer
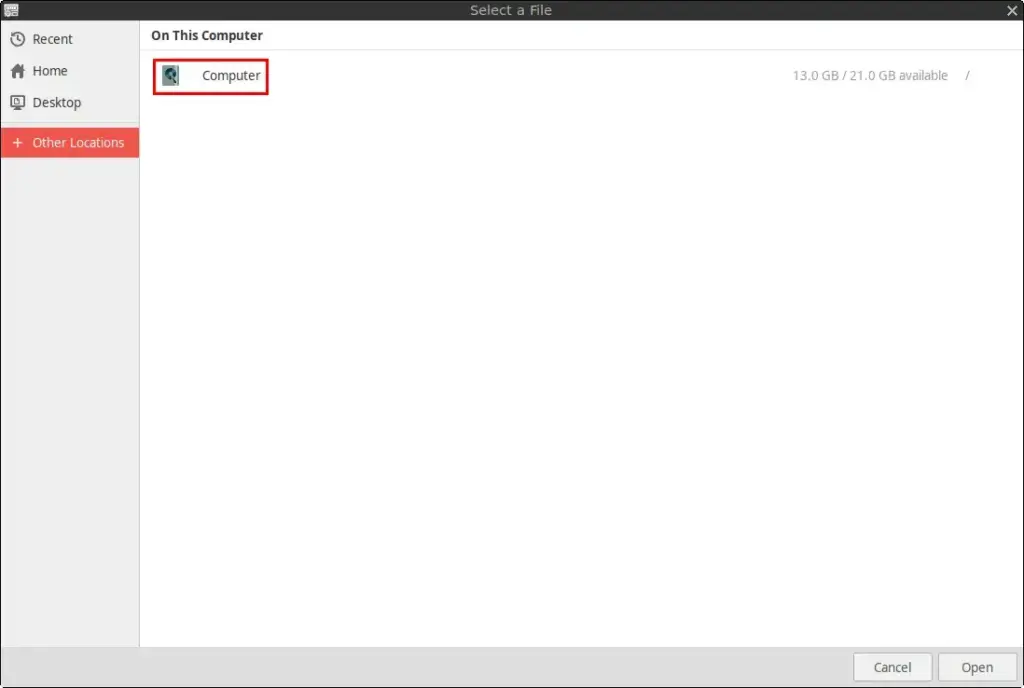
3. Navigate to your home directory by opening the home folder.
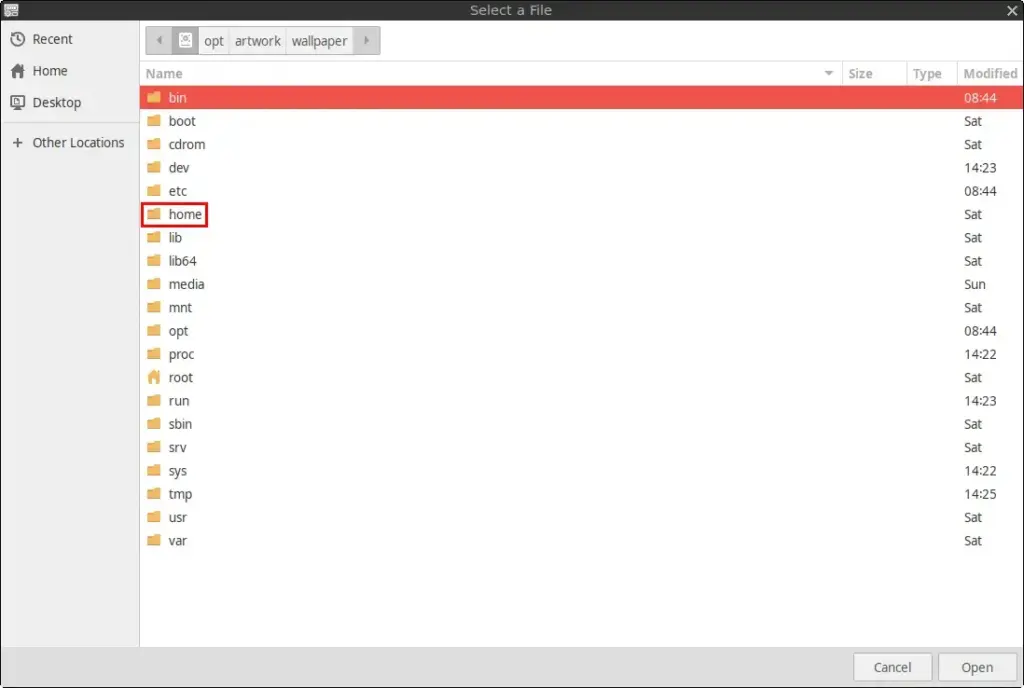
4. Open your user folder (e.g., if your username is bustami, open the bustami folder).
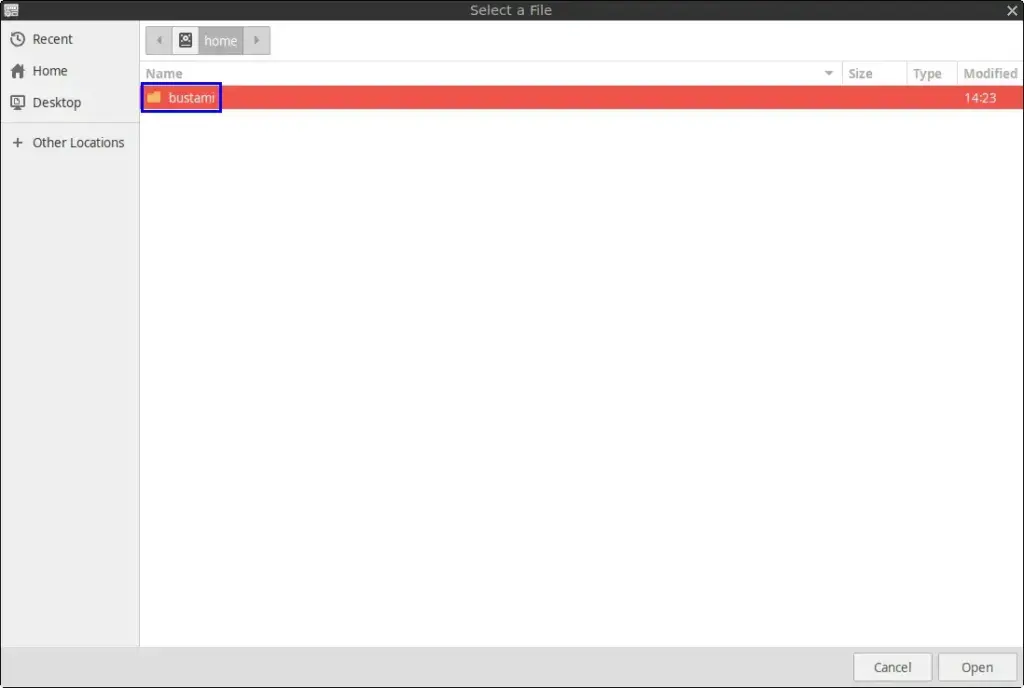
5. Open the Pictures folder, assuming you saved the image there.
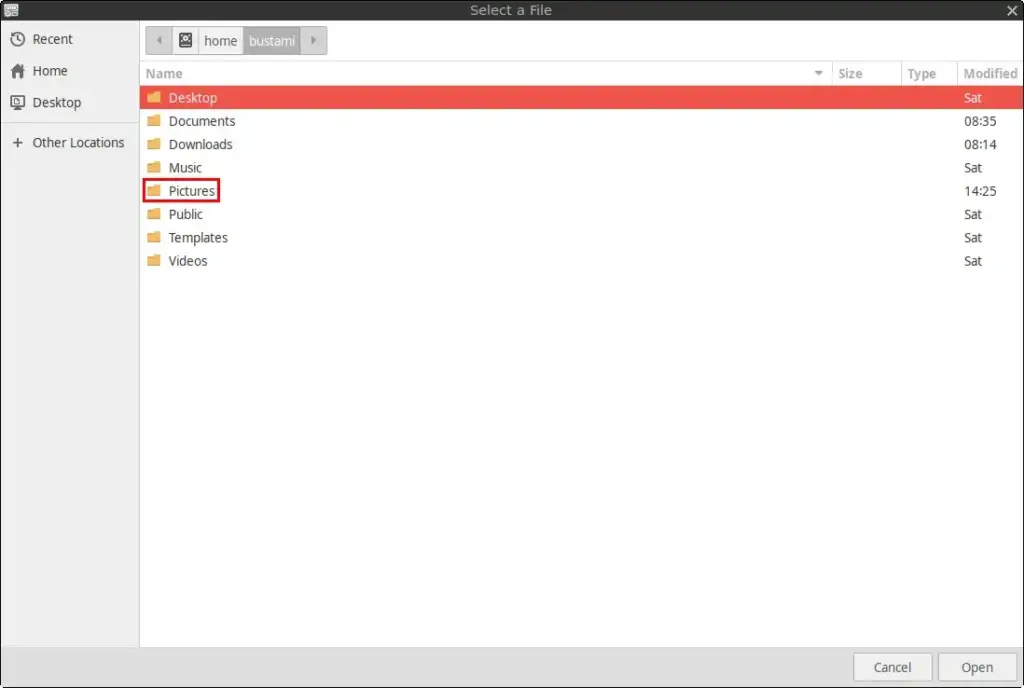
6. Select the image you wish to use as your LightDM background (e.g., 1152.jpg).
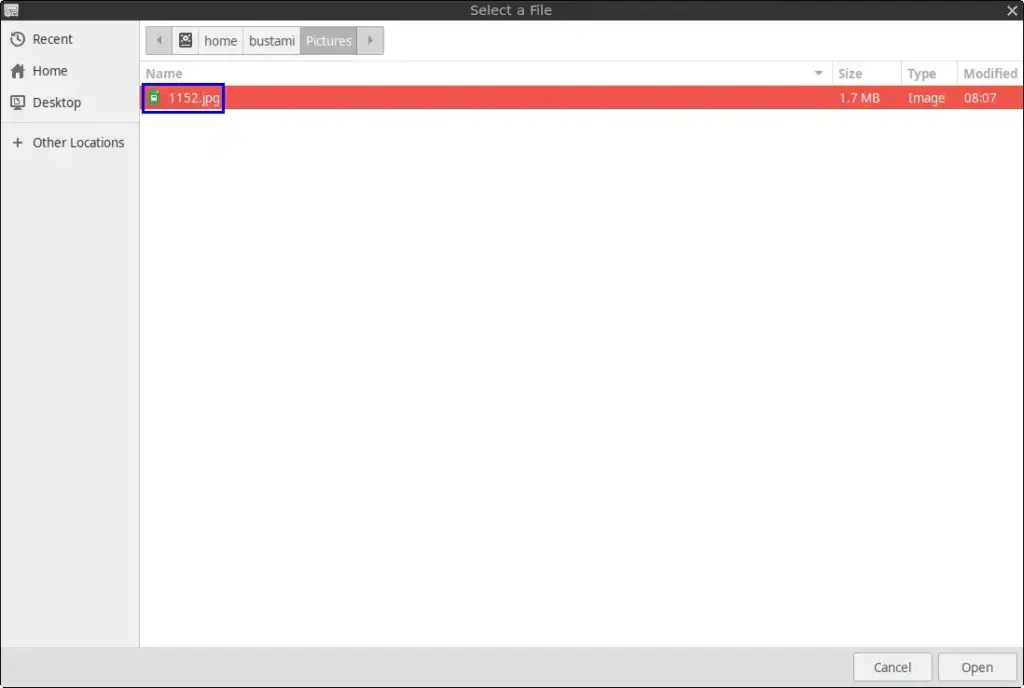
7. Click Open to confirm your selection.
Step 6: Save and Apply the Changes
After selecting your desired image:
1. Click Save to apply the changes.
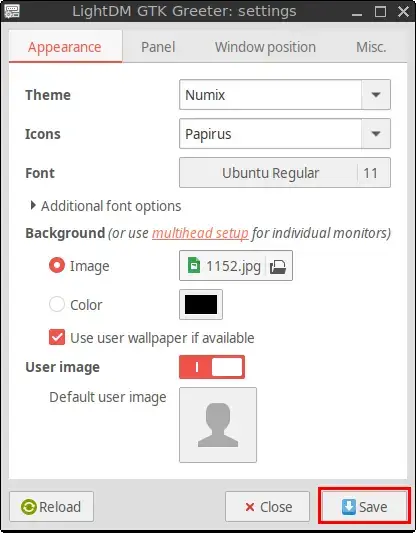
2. Close the LightDM GTK Greeter settings window.
Step 7: Reboot the System
To see the changes take effect, you need to reboot your system. You can do this by either using the terminal or the menu:
Terminal:
sudo reboot nowMenu:
Menu > Log Out > Reboot
After the system reboots, observe the LightDM login page. You should now see the new background image you selected.
Conclusion
By following these steps, you can easily customize the appearance of the LightDM login screen in FunOS. Whether you choose a default wallpaper or a personal image, this simple customization can enhance your login experience.

Leave a Reply