
Setting the correct screen resolution helps ensure that text, icons, windows, and other on-screen elements appear clear and properly sized.
In FunOS, you can change the screen resolution using the Monitor Settings application. On recent FunOS releases, the application can also save your display configuration automatically so that it is restored each time you log in.
This guide explains how to change the screen resolution and, when necessary, make the setting permanent.
How to Change the Screen Resolution in FunOS
Step 1: Open Monitor Settings
- Click the Menu button in the lower-left corner of the screen.
- Go to Settings > Monitor Settings.
The Monitor Settings application will open.
Step 2: Select the Resolution and Refresh Rate
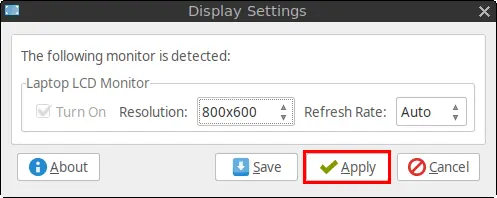
In the Monitor Settings window, select your preferred screen resolution from the available options.
You can also select a refresh rate supported by your monitor.
The available resolutions and refresh rates depend on your display and graphics hardware.
Step 3: Apply the New Settings
After selecting the desired resolution and refresh rate, click Apply.
The screen may briefly flicker while the new configuration is applied.
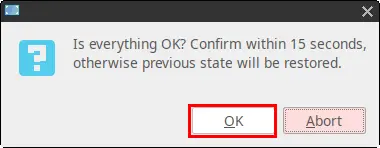
If the display appears correctly, click OK to confirm the settings.
Step 4: Save the Configuration
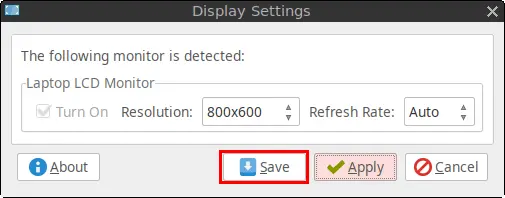
Click Save to save the current display configuration.
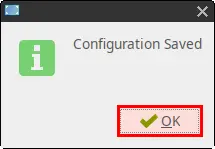
When the confirmation message appears, click OK.
Making the Screen Resolution Permanent
Note: Starting with FunOS 24.04.4 LTS (Build 20260618) and FunOS 26.04 LTS (Build 20260618), clicking Save in Monitor Settings automatically makes the display configuration permanent.
If you are using one of these releases or a newer version, you can skip this section.
On older FunOS releases, the saved resolution may not be restored automatically after restarting the computer. To apply the saved configuration at every login, copy the generated xrandr command into the .xprofile file.
Step 1: Open a Terminal
You can open a terminal using any of the following methods:
- Click the Menu button in the lower-left corner of the screen, then click Terminal.
- Click the Terminal icon in the Tray.
- Press
Ctrl + Alt + T.
Step 2: View the Saved Display Configuration
Run the following command:
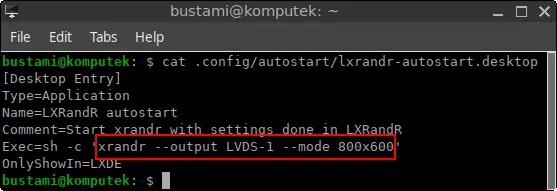
cat ~/.config/autostart/lxrandr-autostart.desktopThis displays the contents of the auto-start file created by Monitor Settings.
Look for the line beginning with Exec=. It contains the xrandr command used to configure your display.
In some cases, the command may be wrapped in a shell invocation. For example:
Exec=sh -c 'xrandr --output LVDS-1 --mode 800x600'In this situation, copy only the xrandr portion of the command (the part inside the quotes):
xrandr --output LVDS-1 --mode 800x600Your actual command may use a different display name, resolution, refresh rate, or additional options. Always copy the command generated on your own system.
Step 3: Open the .xprofile File
Run the following command:
mousepad ~/.xprofileThis opens the .xprofile file in Mousepad. If the file does not already exist, Mousepad will create it when you save your changes.
Step 4: Add the xrandr Command
Paste the xrandr command you copied into the .xprofile file.
For example:
xrandr --output LVDS-1 --mode 800x600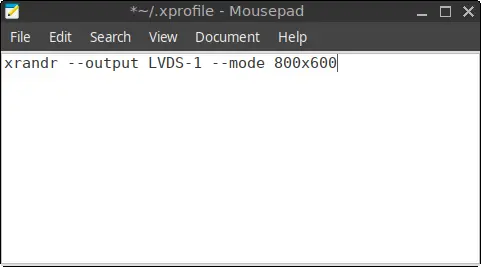
Do not include Exec= or sh -c in the .xprofile file—only the xrandr command itself.
Save the file, and then close Mousepad.
Step 5: Reboot the Computer
Reboot the computer to test the configuration.
You can reboot immediately from the terminal by running:
sudo reboot nowAlternatively:
- Click the Menu button in the lower-left corner of the screen.
- Click Log Out.
- Click Reboot.
After you log in again, FunOS should automatically apply the saved screen resolution.
Conclusion
The screen resolution in FunOS can be changed easily through the Monitor Settings application. Select the resolution and refresh rate you want, apply the configuration, and click Save.
On recent FunOS releases, the saved configuration is restored automatically at login. On older releases, you may need to copy the generated xrandr command into the ~/.xprofile file to make the setting persistent.