
Using multiple monitors can give you more screen space and make it easier to work with several applications at the same time. FunOS includes a graphical Monitor Settings tool that allows you to configure the resolution, refresh rate, orientation, position, and primary display for each connected monitor.
This guide explains how to configure multiple monitors on FunOS and, when necessary, make sure your settings remain active after restarting the system.
Configuring Multiple Monitors Using Monitor Settings
Step 1: Open Monitor Settings
- Click the Menu button in the lower-left corner of the screen.
- Go to Settings > Monitor Settings.
The Monitor Settings window will display the monitors currently detected by the system.
Step 2: Configure the Resolution, Refresh Rate, and Orientation
Select each monitor and configure the following options as needed:
- Resolution: Choose the display resolution that best matches the monitor. The recommended or native resolution usually provides the clearest image.
- Refresh Rate: Select a refresh rate supported by the monitor.
- Orientation: Choose Normal, Left, Right, or Inverted if you need to rotate the display.
Repeat this process for every connected monitor.
Step 3: Arrange the Monitors
Position the Monitors
In the monitor layout area, drag each display to match its physical position on your desk. For example, you can place the monitors side by side or arrange one above the other.
Matching the on-screen layout to the physical arrangement ensures that the mouse pointer moves naturally between displays.
Set the Primary Monitor
The primary monitor is the display where the panel and application menus appear by default.
To set a monitor as the primary display:
- Select the monitor.
- Enable Set as Primary.
Step 4: Apply and Save the Configuration
- Click Apply to test the new configuration.
- A confirmation dialog will appear.
- Click OK if the displays are working correctly.
- Click Abort if the configuration is incorrect and you want to restore the previous settings.
- After confirming the configuration, click Save.
Making the Monitor Configuration Permanent
Note: Starting with FunOS 24.04.4 LTS (Build 20260618) and FunOS 26.04 LTS (Build 20260618), clicking Save in Monitor Settings automatically makes the configuration persistent. Users of these or newer builds can skip the steps in this section.
On older FunOS builds, settings saved through Monitor Settings may not always be restored after restarting the system. In that case, you can copy the generated xrandr command to the .xprofile file so that it runs automatically when you log in.
Step 1: Open a Terminal
You can open a terminal in any of the following ways:
- Click Menu > Terminal.
- Click the Terminal icon in the tray.
- Press Ctrl + Alt + T.
Step 2: View the Saved Monitor Command
Run the following command:
cat ~/.config/autostart/lxrandr-autostart.desktopThis displays the contents of the lxrandr-autostart.desktop file. Look for the line beginning with Exec=. It should contain the command that applies your saved monitor configuration.
For example, you might see something like:
Exec=sh -c 'xrandr --output HDMI-1 --mode 1920x1080 --right-of eDP-1'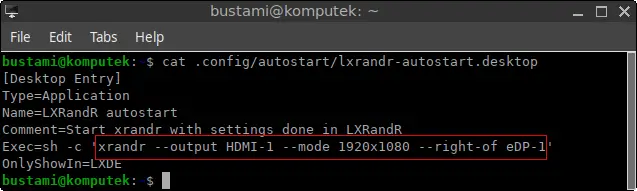
Exec= line contains the command used to restore the saved monitor configuration.Step 3: Open or Create the .xprofile File
Run the following command to open .xprofile in Mousepad:
mousepad ~/.xprofileIf the file does not already exist, Mousepad will create it when you save your changes.
Step 4: Add the xrandr Command
Copy only the xrandr portion of the command from the Exec= line and paste it into the .xprofile file.
If your Exec= line uses sh -c, extract only the command inside the quotes. For example, from:
Exec=sh -c 'xrandr --output HDMI-1 --mode 1920x1080 --right-of eDP-1'you should paste:
xrandr --output HDMI-1 --mode 1920x1080 --right-of eDP-1Do not include Exec= or sh -c.
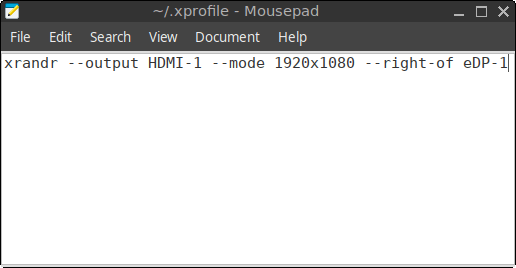
xrandr command added to the .xprofile fileSave the file and close Mousepad.
Step 5: Restart the System
Restart FunOS to verify that the monitor configuration is restored automatically.
To restart from the terminal, run:
sudo reboot nowYou can also restart from the menu:
- Click the Menu button in the lower-left corner.
- Select Log Out.
- Click Reboot.
After logging in again, confirm that the monitors use the correct resolution, orientation, position, and primary-display setting.
Conclusion
The graphical Monitor Settings tool makes it easy to configure multiple monitors on FunOS. You can adjust each display, arrange the monitors to match their physical positions, select a primary monitor, and save the resulting configuration.
On current FunOS builds, saved monitor settings are restored automatically. Users of older builds can make the configuration persistent by adding the generated xrandr command to the .xprofile file.