Installing FunOS on your PC or laptop is a straightforward process. This guide will take you through each step using the Calamares installer, from preparing your installation media to completing the setup on your computer.
Step 1: Prepare Your Installation Media
Before you begin the installation, you need to create a bootable USB stick with the FunOS ISO file. If you haven’t done this yet, follow our guide on how to create a FunOS bootable USB stick.
Step 2: Boot from the USB Stick
- Insert the USB Stick: Plug the bootable USB stick into your computer.
- Restart Your Computer: Power on your computer and immediately press the key to enter the BIOS/UEFI settings (this key is usually F2, F10, F12, ESC, or DEL, depending on your computer’s manufacturer).
- Change the Boot Order: In the BIOS/UEFI settings, change the boot order to prioritize booting from the USB stick.
- Save and Exit: Save the changes and exit the BIOS/UEFI settings. Your computer will now boot from the USB stick.
Once your computer boots from the USB stick, you’ll see the FunOS boot menu. You will have the following options:
- Try or install FunOS: Select this option to start FunOS normally.
- Try or install FunOS (Safe graphics): Use this option if you encounter graphics issues or a black screen with the first option.
Use the arrow keys to select your preferred option and press Enter.
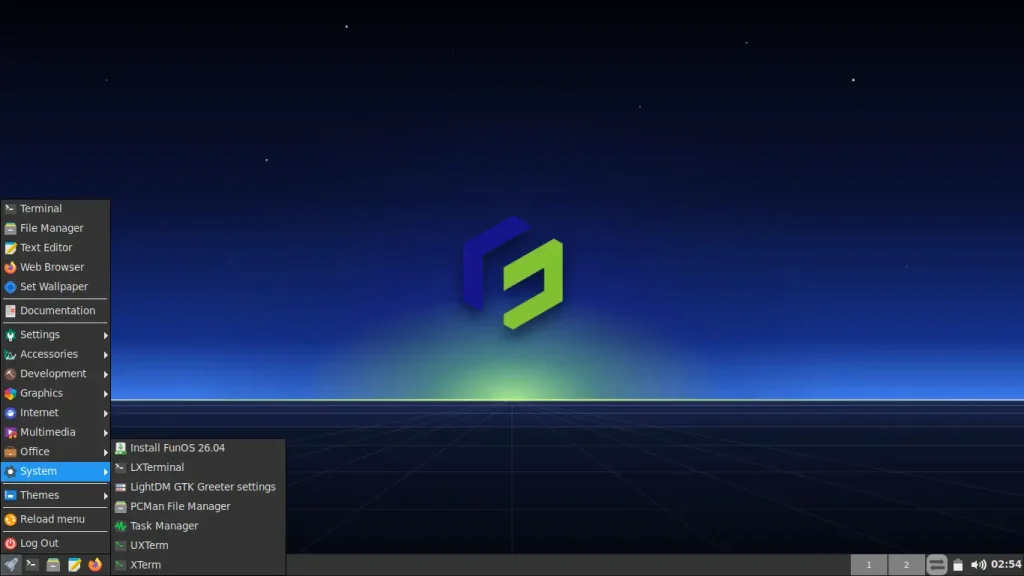
Step 3: Start the Installation Process
After booting into the FunOS live environment, you can start the installation.
- Click on the Menu at the bottom left.
- Navigate to System and select Install FunOS 26.04.
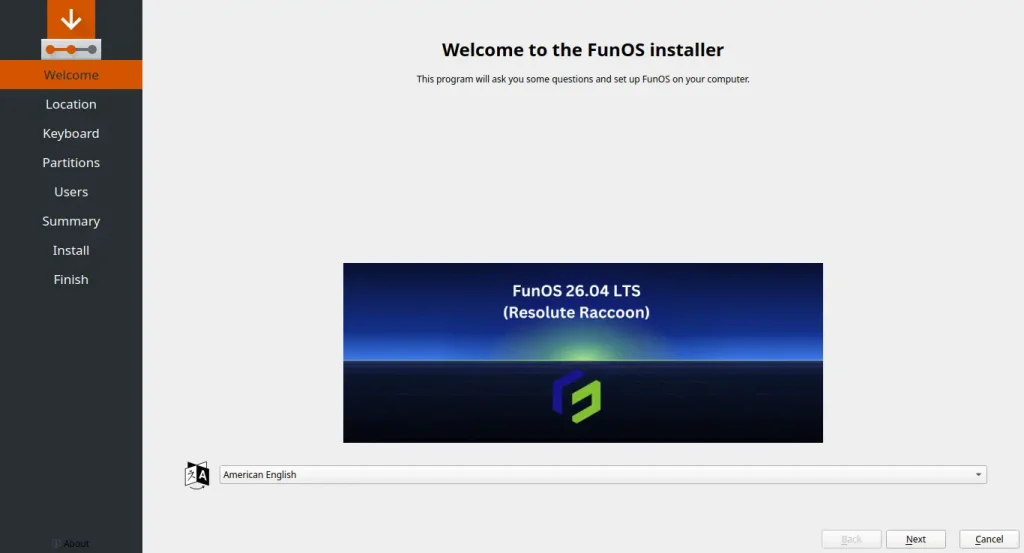
Step 4: Welcome Screen
The Calamares installer will open with the Welcome screen.
- Choose Your Language: Select your preferred language from the drop-down menu at the bottom.
- Click Next.
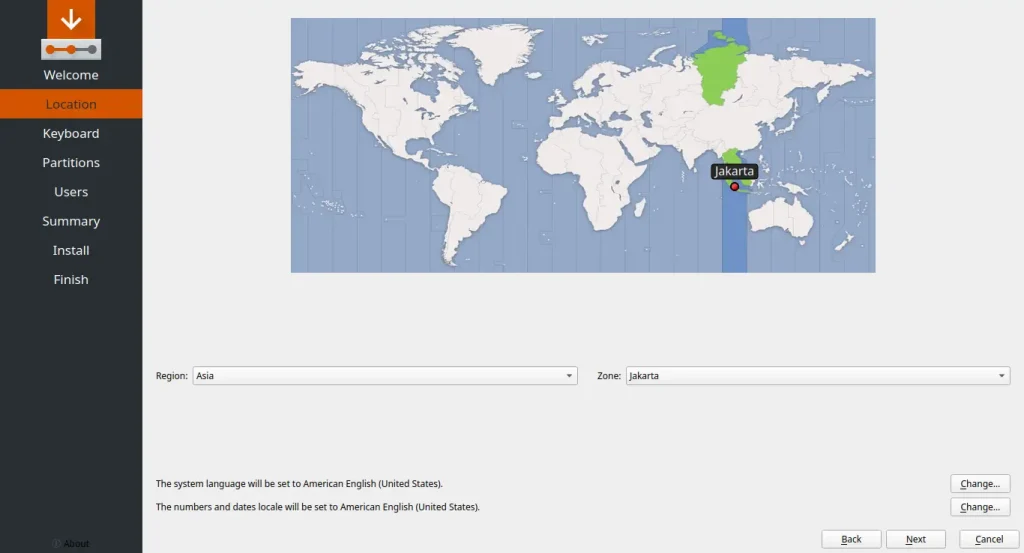
Step 5: Select Your Location
The installer will try to automatically detect your location, but you can set it manually.
- Click on the map or select your Region and Zone from the drop-down menus to set your time zone.
- Click Next.
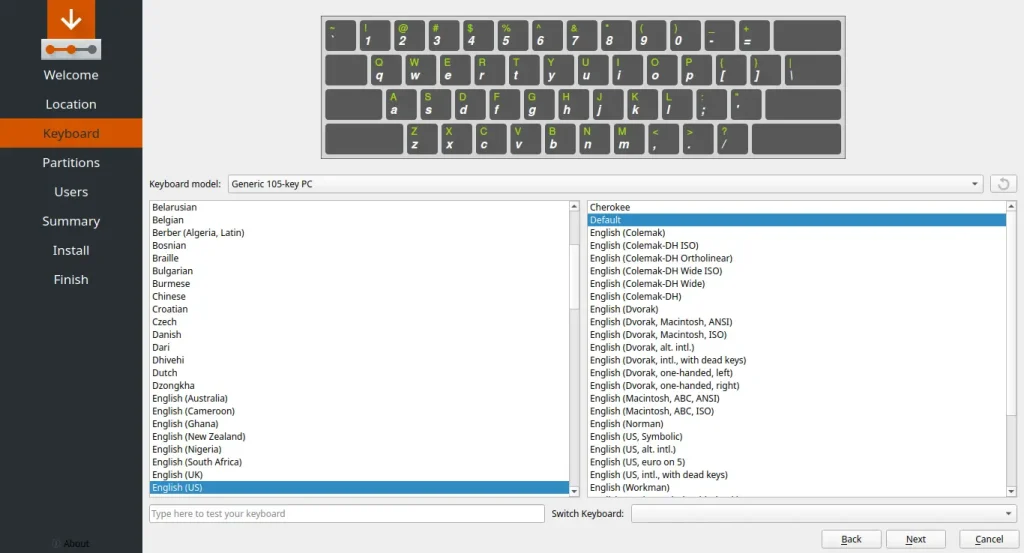
Step 6: Choose Your Keyboard Layout
Select the appropriate keyboard layout for your system.
- Choose your Keyboard model and layout. You can test your keyboard in the text box provided to ensure the correct keys are mapped.
- Click Next.
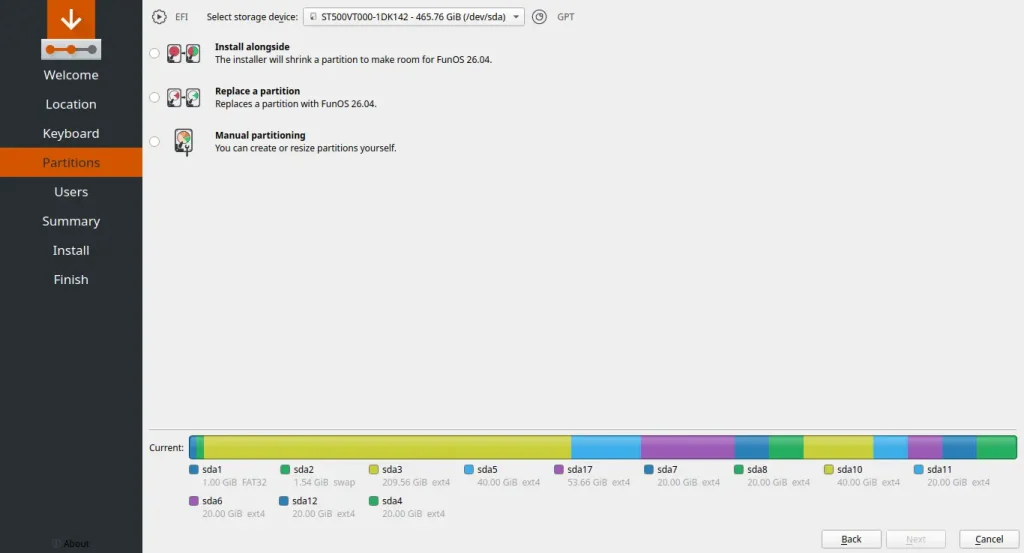
Step 7: Allocate Disk Space
You will now be presented with options on how to partition your disk and install FunOS.
- Select Storage Device: Choose the drive where you want to install FunOS from the drop-down menu at the top.
- Choose your partitioning method. Options typically include:
- Install alongside: The installer will shrink an existing partition to make room for FunOS.
- Replace a partition: Replace an existing partition with FunOS.
- Erase disk: This will delete all data on the selected drive and install FunOS using the entire disk.
- Manual partitioning: You can create or resize partitions yourself.
- After making your choice, click Next.
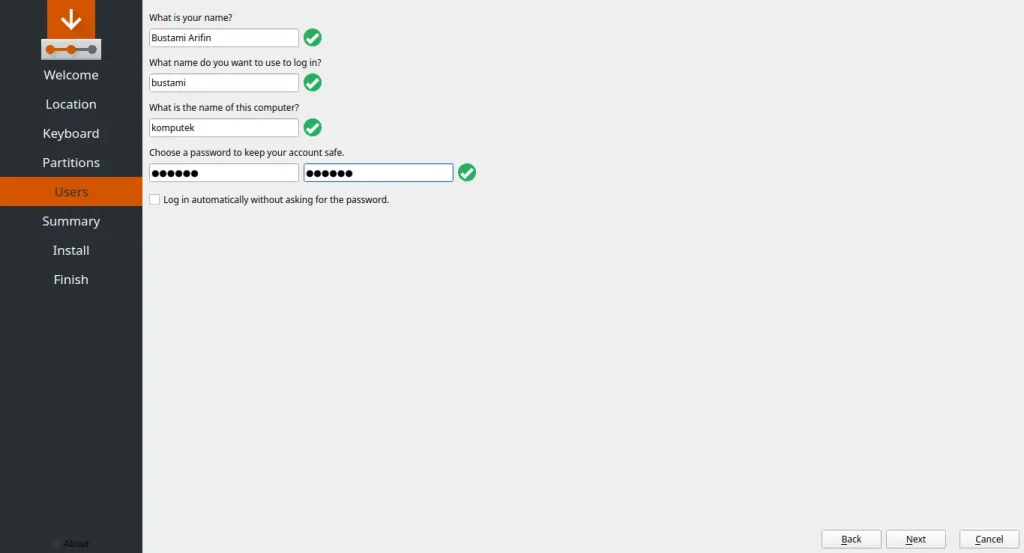
Step 8: Create Your User Account
Set up the default user account and hostname for your computer.
- What is your name?: Enter your full name.
- What name do you want to use to log in?: Choose a username for your account.
- What is the name of this computer?: Enter a hostname to identify your computer on the network.
- Choose a password: Enter and confirm a strong password.
- Check the box if you want to Log in automatically without asking for the password (not recommended for security reasons).
- Click Next.
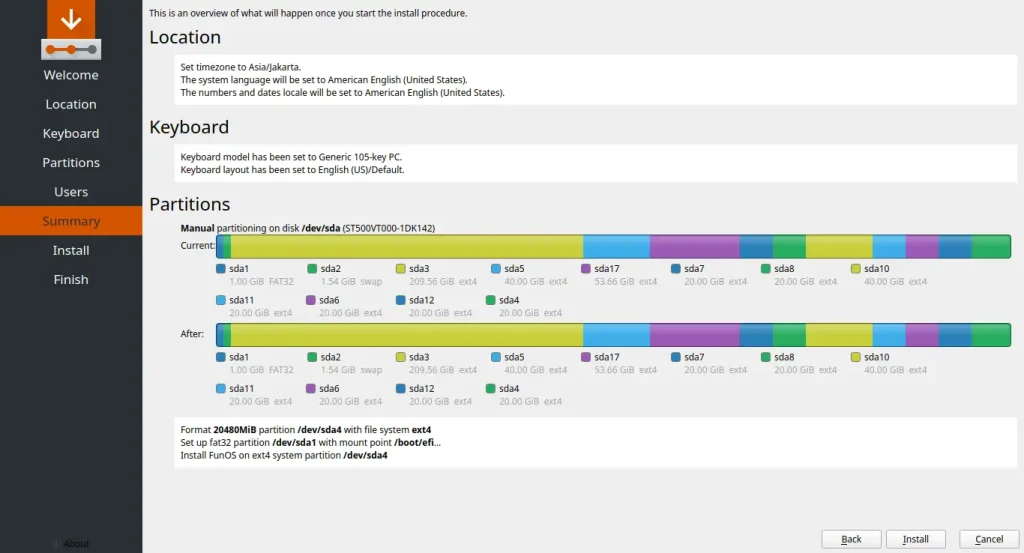
Step 9: Review the Summary
Before proceeding, the installer will display a summary of the changes that will be made to your system.
- Review the settings carefully. Ensure the correct disk is selected and the partitioning plan is what you intend.
- Once you are confident with the choices, click Install.
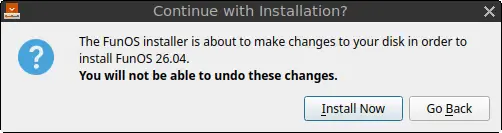
A confirmation dialog will appear, warning you that the changes are about to be made and cannot be undone.
- Click Install Now to begin the installation.
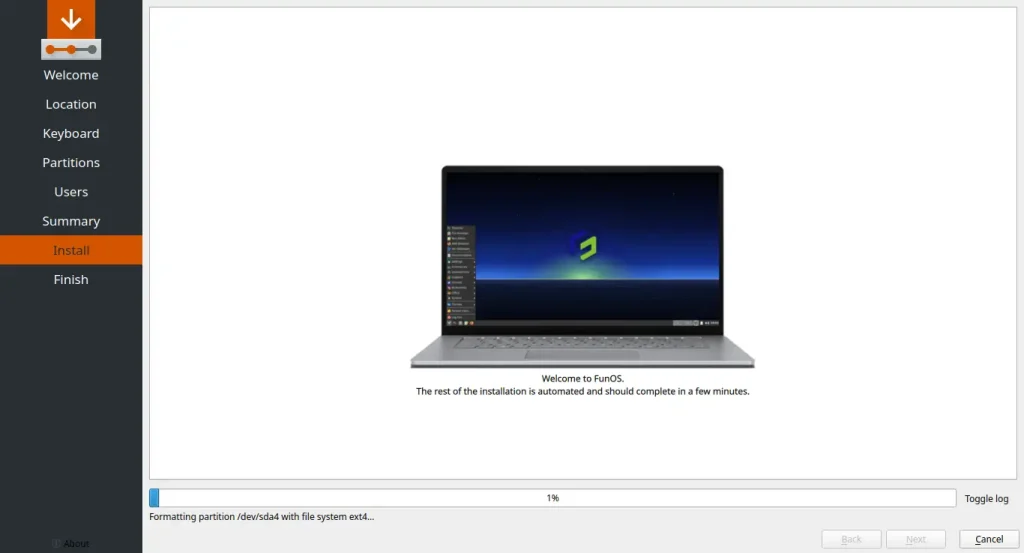
Step 10: Installation in Progress
The Calamares installer will now copy files and configure FunOS on your system. This process will take a few minutes. You can monitor the progress on the screen.
Step 11: Complete the Installation
Once the installation is complete, you will see a screen indicating that it is “All done.”
- Check the box for Restart now.
- Click Done.
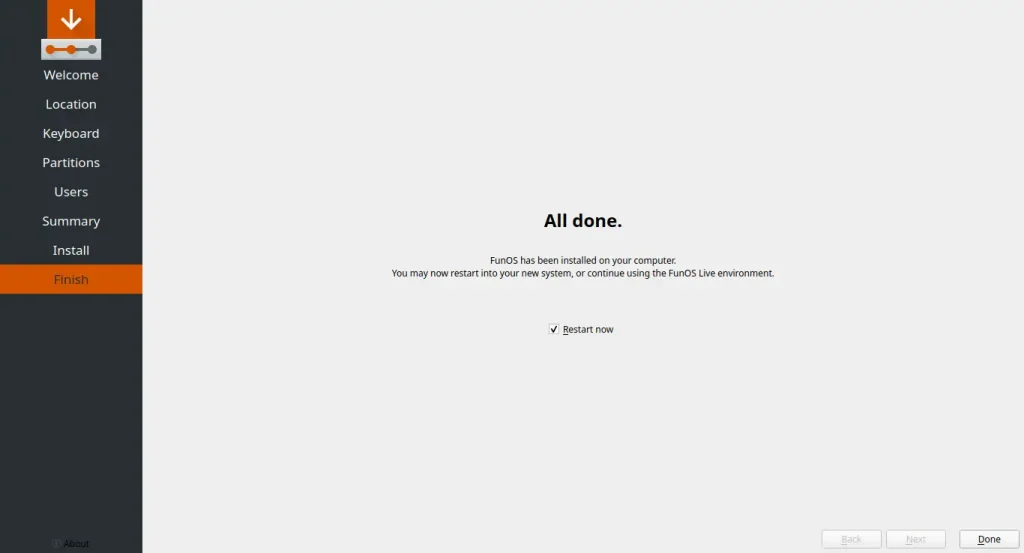
Your computer will reboot. Be sure to remove your USB installation media when prompted or before the system boots back up so it loads into your freshly installed FunOS system.
Conclusion
Congratulations! You’ve successfully installed FunOS on your PC or laptop. Now you can start exploring FunOS and customize it to your liking. For further assistance, check out our other guides on setting up your system, installing additional drivers, and more.