
FunOS does not include printing software and printer drivers by default. To use a printer, you must first install CUPS, a printer configuration tool, and a collection of common printer drivers.
This guide explains how to enable printing on FunOS, start the CUPS service, add a printer, and print a test page.
Step 1: Open a Terminal
You can open a Terminal in any of the following ways:
- Click the Menu button in the lower-left corner of the screen, then click Terminal.
- Click the Terminal icon in the Tray.
- Press Ctrl + Alt + T.
Step 2: Update the Package List
Before installing the required packages, update the package list:
sudo apt updateStep 3: Install CUPS, Printer Drivers, and the Printer Configuration Tool
Install CUPS, System Config Printer, and a collection of commonly used printer drivers:
sudo apt install cups printer-driver-brlaser printer-driver-c2esp printer-driver-foo2zjs printer-driver-foo2zjs-common printer-driver-hpcups printer-driver-m2300w printer-driver-min12xxw printer-driver-pnm2ppa printer-driver-postscript-hp printer-driver-ptouch printer-driver-pxljr printer-driver-sag-gdi printer-driver-splix openprinting-ppds cups-bsd bluez-cups system-config-printerThe command installs several printing components, including:
- CUPS: The printing system used to manage printers and print jobs.
- system-config-printer: A graphical tool for adding and managing printers.
- openprinting-ppds: A collection of PostScript Printer Description files.
- bluez-cups: CUPS support for compatible Bluetooth printers.
- printer-driver-brlaser: Drivers for supported Brother laser printers.
- printer-driver-c2esp: Drivers for certain Canon PIXMA printers.
- printer-driver-foo2zjs: Drivers for various printers, including some HP LaserJet models.
- printer-driver-hpcups and printer-driver-postscript-hp: Drivers for supported HP printers.
- Additional drivers for printers from several other manufacturers.
Step 4: Start and Enable CUPS
Start the CUPS service and configure it to start automatically when FunOS boots:
sudo systemctl start cups
sudo systemctl enable cups
You can verify that the service is running with:
systemctl status cupsPress Q to exit the status screen.
Step 5: Reload the Menu
Note: Starting with FunOS 24.04.4 LTS (Build 20260618) and FunOS 26.04 LTS (Build 20260618), the menu updates automatically. Users of these or newer builds can skip this step.
On older FunOS builds, reload the menu so that the newly installed Printers application appears:
- Click the Menu button in the lower-left corner of the screen.
- Click Reload menu.
Step 6: Add a Printer
You can add a printer using either the graphical Printers application or the CUPS web interface. You only need to use one of these methods.
Method 1: Using the Printers Application
The Printers application provides a graphical interface for configuring printers.
- Open the Menu.
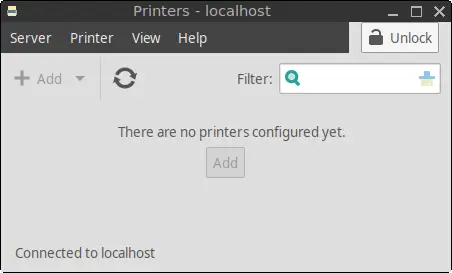
- Go to Settings or System, then click Printers.
- Click Add.
- Wait while the application searches for available printers.
- Select your USB, network, or Bluetooth printer.
- Click Forward.
- Select the appropriate printer driver when prompted. If no exact match is found, you can select a generic driver.
- Enter a name and optional description for the printer.
- Complete the setup process.
Method 2: Using the CUPS Web Interface
CUPS includes a web-based interface for adding and managing printers.
- Open a web browser.
- Go to http://localhost:631.
- Click the Administration tab.
- Under Printers, click Add Printer.
- Enter your FunOS username and password if authentication is requested.
- Select your USB, network, or Bluetooth printer.
- Follow the instructions to choose a driver and configure the printer. If your printer’s model is not listed, use the closest available driver or generic driver.
After completing the setup, you can use the same CUPS interface to manage printers, view print jobs, and change printer settings.
Step 7: Print a Test Page
After adding the printer, print a test page to confirm that it is working correctly.
When using the Printers application:
- Select the printer.
- Open its properties.
- Click Print Test Page.
When using the CUPS web interface:
- Open http://localhost:631.
- Click Printers.
- Select your printer.
- Open the Maintenance menu.
- Select Print Test Page.
Troubleshooting
If the printer is not detected or does not print correctly, try the following:
- Make sure the printer is turned on and properly connected.
- For a USB printer, disconnect and reconnect the USB cable.
- For a network printer, confirm that the printer and computer are connected to the same network.
- Check that the correct driver was selected.
- Restart CUPS:
sudo systemctl restart cups- Check whether CUPS can detect the printer:
lpinfo -vSome printer manufacturers provide their own Linux drivers. If the included drivers do not support your printer, visit the manufacturer’s official website and check whether a Linux driver is available for your model.
Conclusion
Printing support can be added to FunOS by installing CUPS, System Config Printer, and the required printer drivers. After starting the CUPS service, you can configure a printer through either the graphical Printers application or the CUPS web interface.
Once the printer has been added, print a test page to make sure that the device and driver are working correctly.
Just tried LiveUSB FunOS 24.04.2 and I’m so happy with it. I would, however, be happier if the printing functionality is enabled by default — out-of-the-box and autodetecting the printer connected.
Thank you, guys for your best effort to provide a good & fun os for old computers!!!
Hi Timothy,
Thank you so much for your kind words and feedback — we’re really glad to hear you’re enjoying FunOS 24.04.2!
We appreciate your suggestion about enabling printer support out of the box. You’re absolutely right — making printing work automatically would improve the overall user experience, especially for newcomers. We’ll definitely consider this enhancement for the next FunOS release.
Thanks again for taking the time to share your thoughts and for giving FunOS a try on your machine! 😊
Warm regards,
Bustami Arifin
FunOS Maintainer
I followed your instructions and it worked perfectly. This and other instructions on funos.org are extremely helpful. Thanks so much.
Thank you, Fred! I’m really glad to hear the instructions worked well for you. Your feedback means a lot — it helps encourage me to keep improving the FunOS documentation. If you have any suggestions or topics you’d like to see covered next, feel free to share!